
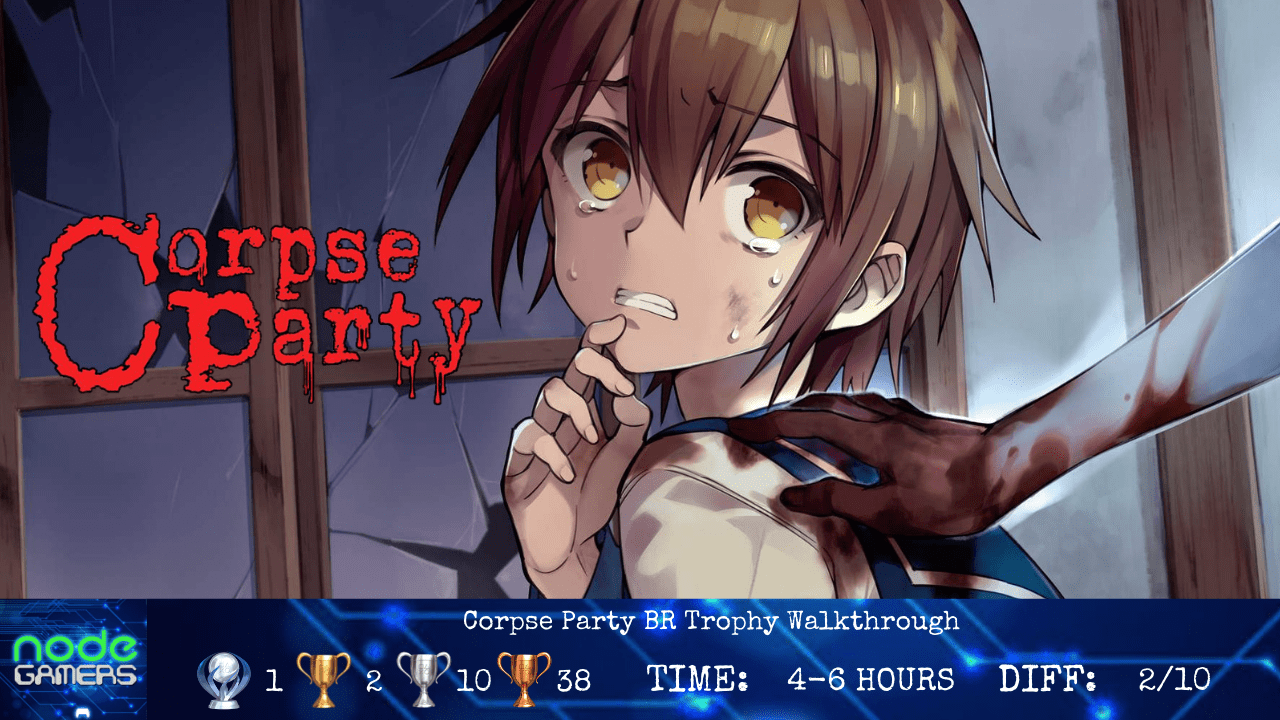
Trophy Roadmap:
Difficulty: 2/10
Estimated time to Platinum: 4 – 6 hours
Trophies: 51. ![]() 1 /
1 / ![]() 2 /
2 / ![]() 10 /
10 / ![]() 38
38
Missable trophies: None
Glitched trophies: None
Difficulty related: None
Playthrough: 1
Introduction:
Welcome to the Corpse Party BR trophy walkthrough!
Developed by Team GrisGris, and published by Marvelous Europe Limited; Corpse Party is a horror adventure game originally released in 1996 before being revised several times and finally compiled and ported to PS4 in 2021. It tells the story of a group of Japanese high school students who, while telling ghost stories one evening, perform the Sachiko Ever After friendship ceremony, which transports them to a haunted high school intent on taking their lives. The students must avoid ghosts and traps while searching for a way to escape back to their world and hopefully stop the malicious forces possessing the school once and for all.
Video guides of this walkthrough are fine as long as I am credited in the video and the guide linked!
Tips and Strategies:
Main menu – Select bottom option to change language to English.
DO NOT SKIP CHAPTER OPENINGS. Some trophies only unlock during chapter openings.
Hold down  to skip through text
There’s no New Game option. You need to do it through chapter select. Chapter select is also where you access your manual saves – the resume option is only for temp saves.
I still recommend making manual saves at candles when you can, but I will point out when you need to make temp saves for trophy reasons. If I do tell you to make a temp save, be careful not to save over it (like if you make a temp save in an area where there’s a chance you might screw up) until you’ve unlocked the bad ending or whatever I told you to make the save for.
That having been said, I do recommend using temp saves when you’re in danger areas. Obviously, prioritize getting the bad ending over the possibility of having to do something over again because you messed up.
MAP: There is no in-game map. THIS MAP (credit SK0RRK33P3R) is from Corpse Party: Blood Drive, but is pretty much the same map for this game.
A full written text walkthrough is provided below, and if you enjoy my work, please consider donating to my Ko-fi.
If you liked this guide, you’ll find more on our site.
You can also chat to our writers and friends by joining us on Discord with this link – Discord Invite
Trophy Walkthrough:
CHAPTER 1
1A
![]() One Rainy Day After School unlocked
One Rainy Day After School unlocked
Check top right door
![]() When the Shaking Stops unlocked
When the Shaking Stops unlocked
Walk as far up as you can, until you see Seiko
Exit bottom right
Main – 2F West
Walk up and left to reenter 1A
1A
Check Seiko
Learn about the characters if you want, or just exit the room
Exit top right
Main – 2F West
Walk down and left to reenter 1A
1A
Pick up loose board from lower left corner
Exit bottom right
Main – 2F West
Click floor just below you
Use loose board with gap – ![]() First-Time Item User unlocked
First-Time Item User unlocked
Go down the stairs to 1F – if you save at the candle here, you will unlock The First Candle (B).
Main – 1F West
Walk as far right, then down, as you can
Click door
Backtrack up the stairs to 2F – make a save at the candle now.
Main – 2F West
Cross the loose board, then pick it up
Walk all the way up, place the board on the gap, and cross
Continue up and enter 2A (second door on right)
2A
Walk to the top left corner of the room
Look at the cabinet on the right until ![]() Spooked! unlocks (3-4x)
Spooked! unlocks (3-4x)
Check the body
Go back to Classroom 1A and read the victim’s memoirs (1/5) above where you picked up the board
Exit to 2F West
Main – 2F West
Exit up to stairwell
Talk to soul
Pick up unknown key
Exit back to 2F West, then 2A
2A
Read the victim’s memoirs (2/5)
Body – get nametag (1/30)
Save at candle
Exit top right
Main – 2F West
Go all the way right
Read victim’s memoirs in top right (3/5)
Go all the way down
Pick up loose board just next to the exit to the stairwell
Exit down the stairs to 1F East
Main – 1F East
Body in top right corner – get nametag (2/30)
Go all the way left, then up
Talk to soul
Go all the way up until you reach a fork in the hallway
Go all the way left and click the body – get nametag (3/30)
Go back to the fork, then go right until you pass an open door
Continue right and enter the next door
5A
Body in top left corner – get nametag (4/30)
Walk down and remember where that glowing purple thing is
Exit to 1F East
Enter 5A from the door on the left
Walk to where the purple thing was
Remember where it is now
Read victim’s memoirs (4/5)
Exit to 1F East
Talk to Soul, then enter 5A from the right door
Click on spot where the purple thing was – just above and left of a dark brown board – I think so.
Exit to 1F East and enter 5A from the left door – get infirmary key – ![]() Fleeting Light unlocked
Fleeting Light unlocked
Exit to 1F East
Main – 1F East
Go left to the fork, then all the way down, then right to East Stairwell
Go up to 2F East
Go all the way up, using the loose board to cross a gap, and up the stairs to 3F East
Main – 3F East
Body in right corner – get nametag (5/30)
TEMP SAVE – press  , then temp save. This is a quicksave – you have one quicksave slot per chapter, but you can use it as many times as you want, and it’s not the kind of quicksave that goes away once you hit the main menu/close the game. Use this to your advantage while playing.
Go left and read the victim’s memoirs (5/5) – WRONG END 3
RESUME. This time, DO NOT read the memoirs. Just enter the far left door.
Girls’ Lavatory
Check all the stalls, then leave
Walk right until one of the best cutscenes in gaming ever
Try to go downstairs
Go back into the Girls’ Lavatory
Go down to 2F East
Main – 2F East
Walk all the way left and enter 2A
Make a save at the candle – IMPORTANT
Exit to 2F East and go right to the intersection
Go down and open the second door on your right
Infirmary
Make a SEPARATE save at the candle
Click space heater – pick up matches
Use beds
Check bottom left exit
Check all three cabinets, then try to exit again
Walk to the desk (there should be some dialogue; if not, keep walking around), then try to exit again
If at any point you are caught by the spirit, you will unlock WRONG END 2. Don’t set out to do it deliberately, as it’ll likely happen as you’re learning the path through the Infirmary.
While avoiding the spirit, walk down and left and use a match on the door
Staying to the left of the white curtains, and still avoiding the spirit, go up and right to the white cabinet and search it – get alcohol (if you try to approach it from the bottom/right, your path will be completely blocked off)
While avoiding the spirit, use alcohol and matches with door, then exit – ![]() Hairy Situation unlocked
Hairy Situation unlocked
You will end up in 3F East
Go left and enter Girls’ Lavatory
Girls’ Lavatory
Check second stall from the left (shoes in front)
Check Seiko
Go to 3F East, pick up bucket, go back into Girls’ Lavatory
Use bucket with Seiko – ![]() A Leg Up unlocked
A Leg Up unlocked
WRONG END 1
Load your other save – the one you made in 2A.
Exit to 2F West
Main – 2F West
Walk right and check the first door you come across
Enter 3A
3A
Body – no nametag yet, but you still need to check it
Read the newspaper on the ground
Try to leave
Check the newspaper, body, door, and blackboard. This should trigger a cutscene. If it doesn’t, check the things again until it does. There’s also an unlit candle in the bottom right you can check but it shouldn’t be necessary.
Walk towards the door – it will open
Body – get nametag (6/30)
Go to the Infirmary and follow the walkthrough from that point. Remember that you can hold to skip through the text. But notably, you can make a save just before triggering the spirit this time around (or just temp save). If you haven’t unlocked WRONG END 2, then save, deliberately get caught, then continue with the walkthrough. There’s some scenes you haven’t see before, and then you’ll successfully pass Chapter 1 – ![]() Let’s Make Up unlocked
Let’s Make Up unlocked
CHAPTER 2
Main – 2F West
Walk down until you see a bucket, then enter the left door (1A)
Pick up power stone in lower left corner
Give power stone to Shinozaki, then exit to 2F West
Enter up to 2F Stairwell
Pick up 3A key, then exit back to 2F West
Walk all the way right and use key to enter 3A
3A
Talk to spirit
Exit top right (you can’t)
Spare my students – ![]() Self Sacrifice unlocked
Self Sacrifice unlocked
Exit to 2F West
Go up and right, then enter the first door
2A
Read note in top right
Exit top right (you can’t)
Exit bottom right to 2F West, then left, down and enter 1A (the entrance midway down the hall, not the one by the bucket).
1A
Look at desk in front of chalkboard
Exit to 2F West, then all the way down to stairwell (![]() Good Thinking! unlocked)
Good Thinking! unlocked)
SAVE YOUR GAME, then exit to 1F West
Go right to the intersection, then up and left, and enter the first door you see.
4A
Walk left, stand in front of the boy, and talk x2 (the first time, the power stone will shatter) – WRONG END 1
Reload save and enter 1F West
Main – 1F West
Walk right to the intersection, then up until the corpses
Inspect all four for tags (7-10/30)
Continue up and left
Inspect corpse for tag (11/30) (may need to more than once for the tag to show)
Read victim’s memoirs (1/5)
Enter 4A
4A
Walk left, past the boy (don’t talk to him)
Pick up nail puller from desk
Exit to 1F West (keep as far away from the boy as possible, or you will lose your power stone. You’re not required to have this, but it’s handy to have later on, so try not to lose it now)
Main – 1F West
Walk right to intersection
Walk down until a cutscene plays
TEMP SAVE
Continue down until you can go left (do not exit down), then go left and into the stairway
Go up to 2F West
Go up and enter 1A (top entrance, not bucket entrance)
1A
Use nail puller with door blocked by cabinet next to blackboard
Enter room
Pull switch that’s in the room
Exit to 2F West, then down to stairway, then 1F West
Go right to intersection, then up, then left and enter 4A
4A
Walk left, past the boy, and pull the switch
Exit to 1F West, to the intersection, and down until a cutscene – WRONG END 2
RESUME
Walk down, exit to entranceway
Entranceway
Read victim’s memoirs in bottom left corner (2/5)
Talk to Ayumi x2
Exit, then immediately reenter entranceway
You now need to avoid the boy for the rest of the game. He will stay on 1F and will not follow you to other floors. This is pretty easy to do, but if he does catch you, you have the power stone (or other objects in later chapters) in your inventory to get away once (if you get caught in this chapter, it’s likely to be in 4A. You actually want to get rid of the power stone for an ending, so don’t be afraid to lose it).
Follow the walkthrough from before – go to 1A and pull the switch (read victim’s memoirs 3/5 here as well!), then 4A and pull the other switch, then back to the intersection
Walk right across the bridge you made and up the stairs to 2F East
Main – 2F East
Walk all the way up and enter the stairwell
Nametag (12/30) here
IF YOU HAVE NOT LOST YOUR POWER STONE, DELIBERATELY DO SO BEFORE CONTINUING. Just go downstairs to 1F and run into the boy.
Exit to 3F East
Main – 3F East
Read victim’s memoirs (4/5)
Enter first door (boy’s lavatory)
Look at left-most mirror
Exit to 3F East and enter left door (girl’s lavatory)
Talk to Ayumi x2 – say whatever
TEMP SAVE
Exit to the stairwell – WRONG END 3
RESUME
Enter girl’s lavatory
Open second stall from the left, then leave
Go to 2F East
2F East
Walk down to the candle
Enter the infirmary – cutscene (obtain newspaper), then leave
![]() Faded Star unlocked
Faded Star unlocked
Go downstairs to 1F East, walk all the way left to 1F West, then up to 2F West and all the way up to stairwell
TEMP SAVE
Read victim’s memoirs (5/5) outside of the stairwell – WRONG END 4
RESUME
Enter stairwell and pick up doll head – ![]() Using Your Head unlocked
Using Your Head unlocked
Exit stairwell, go down to the other stairwell and down to 1F West
Go to intersection, then up, then right
Pick up doll body – ![]() Body Snatched unlocked – get penitent spirit
Body Snatched unlocked – get penitent spirit
Go to intersection, then down, then right and to the stairs and up to 2F East
Enter the Infirmary
After cutscene, walk up
![]() The Lurking Threat unlocked
The Lurking Threat unlocked
CHAPTER 3
1A
![]() Horrible Night for a Curse unlocked
Horrible Night for a Curse unlocked
We have to try anyway!
Read paper in top right
Exit top right to 2F West
Go up and enter 2A
2A
Two corpses in here for tags (13-14/30) – the red one needs to be inspected a few times
Exit top right
Walk right, read victim’s memoirs (1/5) – get tag (15/30)
Go back to 2A
Exit bottom right
We’ll be okay, Yuka
Enter 1A from bottom (bucket), walk to top left and remember where the light brown square is
Exit, walk up (short cutscene), enter 1A top entrance
Stand where the light brown square was (below far left desk) and press  to leave Yuka. If you can’t leave her, go back to lower 1A and walk around – Satoshi should comment that the board is moving around.
TEMP SAVE
Go to lower part of 1A
Decline – get loose floorboard
Walk down, place the loose board, go downstairs to 1F West (![]() Future Unknown unlocked), walk right and stand in front of the boy – WRONG END 1
Future Unknown unlocked), walk right and stand in front of the boy – WRONG END 1
RESUME
Go to lower part of 1A
Take it – get loose floorboard and scented beads – ![]() Charmed unlocked
Charmed unlocked
Go down, place loose floorboard, and go down to 1F West
Main – 1F West
Nametag on corpse (16/30) – check twice
Go right to intersection, then down to entranceway
In entranceway, read victim’s memoirs in bottom left (2/5)
Exit to 1F West, go right at the intersection and up 1F East stairs to 2F East
Main – 2F East
Go up to stairway
Nametag on corpse (17/30)
Pick up key
Exit up to 3F East
Enter girl’s lavatory, go as left as you can, then exit
Go down to 2F East
Go down through the dark part of the hallway and use key to enter Infirmary – ![]() Heart Pains unlocked
Heart Pains unlocked
Infirmary
Look at beds – If you insist
Read newspaper next to save candle
Exit to 2F East
Pick up nail puller, then go up stairs to 3F East
Main – 3F East
Use nail puller with boy’s lavatory, and enter
Look at right urinal
Read victim’s memoirs (3/5) on left
Go down stairs to 2F East, then down to stairs and down to 1F East
Main – 1F East
Notice new area to the right
Walk all the way left and up west stairwell to 2F West, then enter 1A (top)
1A
Use nail puller with cabinet left of blackboard – get tiny key
Exit downstairs to 1F West, then all the way right
Inspect corpse (18/30)
Use key to unlock door
Walk right to Second Wing Entranceway, then left to Second Wing 1F West
Second Wing 1F
Exit top left to stairway
Go down stairs
Read victim’s memoirs (4/5) and inspect corpse (19/30)
Go up all staircases for another corpse (20/30)
Go down two staircases and exit right to 2F.
Second Wing 2F
Go right through two rooms into Second 2F East
Walk down and enter either the top or bottom door (Art Room)
Make your way to the top right and talk to the girl
Exit top left and go up
Follow the girl and talk to her when she stops
Follow her again into the stairwell (cutscene)
Go back out and look at the door with all the papers on it
Go into the stairwell, down two staircases, and exit right to Second Wing 1F West
Second Wing 1F
Enter top right door and go all the way left
Exit, then exit right to entranceway.
TEMP SAVE
Exit up to bridge, then walk left
After cutscene, don’t move – WRONG END 2
RESUME
Exit up to bridge, then walk left
After cutscene, exit right to Second Wing Entranceway (![]() Fear and Loathing in the Halls unlocked), then left to west wing, then stairwell, then up two stairs to Second Wing 2F West
Fear and Loathing in the Halls unlocked), then left to west wing, then stairwell, then up two stairs to Second Wing 2F West
Second Wing 2F
Walk right to new room (cutscene)
Let Morishige run into you – ![]() Reunion unlocked
Reunion unlocked
Backtrack to Second Wing Entranceway, then walk right until your path is blocked
Try to re-enter west stairwell – ![]() Unexpected Encounter unlocked
Unexpected Encounter unlocked
Enter west stairwell, up two staircases, and exit to 2F
Go right into next room
Inspect body twice for nametag (21/30)
Exit right. Go right, then down and enter Art Room
Read note in center of room, then exit bottom left
TEMP SAVE
Walk all the way up and walk on the green stuff until you die – WRONG END 4
RESUME
Walk all the way left, then up to stairwell
Go down one flight of stairs for corpse (22/30)
Go down next flight of stairs and exit right to 1F East
Second Wing 1F East
Walk right until you see the closed door in bottom right
Walk left a few steps – the screen will stop for a minute to indicate something has happened
Turn around and enter the bottom right door (Music Room)
Make your way through the desks until you reach an overturned cabinet, and move the cabinet
Interact with the desk on the right that the cabinet was blocking – pick up the blessed shoes
Exit bottom left
Walk all the way left and up to 2F East
Second Wing 2F East
Walk right and all the way up over the green stuff and pick up the crystal of unsealing
Go down, then left at the first intersection. Continue walking left through the next two rooms (do not interact with the door with the paper on it)
Go down two staircases and exit to 1F East, then right to Entranceway
Walk right, past candle, to cabinet
Interact with cabinet x2 – get loose floorboard
Exit up to bridge, then Main 1F East
Main – 1F East
Go to intersection, then up
Click cabinet to move it, then continue up
Two corpses at the top (23-24/30)
Go right for another corpse (25/30)
Go left, past the two corpses, and use floorboard with gap so you can access corpse (26/30)
Go back to the two corpses and walk down, sticking to the left side for another corpse (27/30)
Go down until you can see the shoes leading to the entranceway, then go right, cross the bridge, to Second Wing.
Second Wing 1F
Go left twice to stairwell, up two staircases, and exit to 2F
Use unsealing crystal with door and enter
Staff Room
TEMP SAVE
Go down a few steps and left to read victim’s memoirs (5/5) – WRONG END 3
RESUME
You can’t get this corpse because you read all the memoirs. If you wanted to get it, you cannot read memoir 4/5.
Walk to bottom right and read note (“Strange But True”)
Walk left and pick up Mini DV Tape
Exit top left
![]() Back to Who You Care For unlocked
Back to Who You Care For unlocked
CHAPTER 4
Main – 2F East
Go south and down the stairs to 1F East
Main – 1F East
Follow the path until a T-intersection, then go left
Inspect corpse and read note – (28-29/30)
Walk past the T-intersection and enter 5A
Walk to top left to see the glowing thing
Enter the other 5A entrance and remember where the glowing thing is (this one is easier to remember)
Go back to the T-intersection and follow the path back to 2F East, gathering the tag in the stairwell on the way (30/30) – ![]() Memorial for the Departed unlocked
Memorial for the Departed unlocked
As long as you’ve unlocked the trophy here, you no longer need to collect tags. I will no longer point them out here. If you still need to collect them, just search bodies. Don’t search bodies that have red flames over them.
Main – 2F East
Go up until cutscene
Keep going up, over the loose floorboard, and into the stairwell
Pick up the phone – ![]() Screams of Woe unlocked
Screams of Woe unlocked
Continue up to 3F East
Main – 3F East
Walk all the way left and enter Girl’s Lavatory
Walk all the way left, then try to leave
TEMP SAVE (just in case you make dialogue mistakes)
Open the middle stall (there’s blood in front of it)
Kick in the door
Try to hold her up
Hoist her up on shoulders
Reach behind to unfasten
No need to apologize
You will end up in the Infirmary
Exit, go down, and down the stairs to 1F East
Main – 1F East
Walk a few steps up, and to the right wall
Examine the middle sink
Collect two tags from the toilet stalls if you want
Exit to hallway
Walk a few steps left and take the first exit down
Go up a floor and enter the first door (Infirmary)
Pick up doll
Walk to the bed
TEMP SAVE
Walk in front of boy – WRONG END 1 – ![]() Multi-Ending unlocked
Multi-Ending unlocked
From now on, I won’t be doing wrong ends, except for one that is required for a later trophy.
RESUME
Exit to hall, down the stairs to 1F East
Walk left, past the shoes, and down at the body
Take the stairs up to 2F West
Main – 2F West
Walk past the bucket and enter the next door on the left (1A)
Click the teacher lectern, then exit
Walk up and right, and enter the first classroom (2A)
![]() Searching For Him unlocked
Searching For Him unlocked
Read the book in top left cabinet
Exit to 2F West, all the way left, then all the way down, and downstairs to 1F West
Main – 1F West
Walk to the top right corner of this floor, to a red door
With the door at your back, walk down 6 steps (you may hit a broken floor before that; that’s fine) then left 13 steps
From where you stop, walk directly down to the wall and press X
You will pick up Ryou’s tongue
Go left to the intersection, down to the shoes, right and up the right staircase to 2F
Main – 2F East
Walk up then enter the Infirmary
Stand in front of the boy, then give his tongue back
Main – 1F East
Follow the path left and up to a T-intersection, then go right to the red door
Pick up Seiko’s cell phone
Go back to the T-intersection, then down and follow the path up the stairs to 2F East
Once Naomi joins you again, backtrack to the T-intersection
Enter the first door on the right (5A)
Stand between the two long wooden floorboards above the desk and press to leave Naomi
Leave the room and enter the next door on the right, walk towards Naomi
Naomi should pick up the light. If not, reposition and try again – get custodian’s key – ![]() Fleeting Light Redux unlocked
Fleeting Light Redux unlocked
Go right, open the red door and enter
Custodian’s Closet
Look at TV
Read note on ground
Exit to 2F East, then downstairs to 1F East
Walk left until shoes, then down to Entranceway, then walk down until the doll talks
Exit back to 1F, then left and into the 1F/2F West stairwell
Stand where the crack is between the two banisters and press X
Walk left 1 and up 10 – you’ll be in a specific spot on 2F West – press – get winder
Go past bucket and enter next door on the left (1A)
Enter room behind the cabinet
Use winder with switch, then pull switch
Exit to 1A, then 2F West, then down to 1F West, then exit left to locker room, then bottom left to pool
Pool
Walk all the way around the pool and check the note and door on the other side
TEMP SAVE (just in case)
Walk back the way you came and pick up the pump room key
This next part is timed, but you can pause and stop the timer!
Quickly go back to the locker room and walk until Yoshiki realizes Ayumi isn’t there
Go back to the pool
Walk around the top of the pool and go down the ladder in the top left corner
In the middle of the top of the pool is something that looks like a cross. Stand on the right side of the tip of the cross, walk down twice, and press – ![]() What Lies Beyond unlocked
What Lies Beyond unlocked
Walk around pool to pump room and enter it
Walk to the red drainage valve in top right and use it, then exit – ![]() Drainage Dilemma unlocked
Drainage Dilemma unlocked
Go into the pool and look at the open grating in the middle – get rusted valve wheel
Go back into the pump room
Walk against the big machine in the middle until you get a prompt to place the wheel, then do it and click it until it won’t turn anymore
Go back into the pool and pick up Tokiko’s tongue from the top right corner
Exit back to locker room, then 1F West
Main – 1F West
Go right and enter 1F/2F East stairwell
In 2F stairwell, you will get Yuki’s tongue after a cutscene
Go back down to 1F East
TEMP SAVE just in case
Go left to intersection, then up until cutscene – ![]() Tongue Tied unlocked – this trophy will not unlock unless you have BOTH tongues in your inventory
Tongue Tied unlocked – this trophy will not unlock unless you have BOTH tongues in your inventory
Talk to Ayumi
Talk to Ayumi when she moves
Walk along the right windows
Exit top right
Cutscenes
![]() Return and Pursuit unlocked
Return and Pursuit unlocked
CHAPTER 5
Second Wing – 2F West
Stay silent
Try to exit bottom right
You’ll end up in stairwell
Go down two flights and exit
After cutscene, you will be chased. The game will continue if you fail it, but you need to pass it for a trophy a bit later. Pause if you need to to read the walkthrough.
Go down two flights of stairs. Run right until the cabinet falls over, then double back. Go up two flights of stairs and exit. Go as far right as possible, then down and left and into the stairwell. Down two flights and exit to 1F East
Second Wing – 1F East
Run right, up, and then left at the first intersection and exit
Pick up front door key (DO NOT TEMP SAVE HERE; he will immediately show up and kill you if you try to exit after temp saving here)
Backtrack through 1F East to the stairwell (you can temp save while backtracking), up two flights of stairs and exit to 2F West
Run as far right as possible, then up and left at the first intersection and exit
Continue left to the stairwell, go down two flights of stairs and exit to 1F West
Exit right one screen to Entranceway, then exit up with the key and across the bridge to Main Building
Main – 1F East
You are still being chased.
Go left until cutscene, then down and into the stairwell up to 2F East
Run up until cutscene
![]() Corpse Mania unlocked during cutscene, then
Corpse Mania unlocked during cutscene, then ![]() Shared Misfortune unlocked soon after
Shared Misfortune unlocked soon after
All right, we’ll go back
Main – 2F East
You are in a remodeled 1A. Exit right – get marble statue
Go up until Ayumi talks, then down and down the stairs to 1F West
Go right until cutscene – get Naomi’s ID
Main – 1F
Exit Custodian’s Closet
Walk right until cutscene
Pentagrams will now appear on the ground. Stepping on them will allow you to switch between parties.
Go left to the candle and read the note
Pentagram – ![]() Divide and Conquer unlocked
Divide and Conquer unlocked
Satoshi
![]() I Thought We Were Friends… unlocked
I Thought We Were Friends… unlocked
You are in Second Wing Entranceway as Satoshi
Exit left – get Yuka’s shoes
Go left into the stairwell and pick up Morishige’s cell phone
Backtrack to the Entranceway and talk to Yuka – get Mini-DV Tape 2
Exit up and across the bridge to Main Building 1F
Walk left, past the intersection, and down to the stairwell, up to 2F East
Use the switch, then go back down to 1F East
Walk right and up at the intersection and enter the Custodian’s Closet
Use Mini-DV Tape 2 with TV
Enter the white door
Go first – get Mini-DV Sin Tape
Pentagram
Ayumi
You are on Main – 1F.
Go right to intersection, then all the way down and into Entranceway
Go down and pick up Naho’s notebook
Go back to hallway and left at the first intersection and up to 2F
Go halfway up and pick up the pages on the right
Go back down to 1F, and pick up the pages near the intersection
Go back up to 2F, go up to the T-intersection and left (if you can’t cross, Satoshi didn’t throw the switch)
Look at windows left of candle (I recommend saving here, too)
Enter room (Science Lab)
TEMP SAVE
Look at the covered thing
Go down and pick up the pages
Walk back up
Get caught – WRONG END (this will unlock an EX chapter we need for trophies once we’ve cleared the chapter)
RESUME
DO NOT look at the covered thing.
Go down, pick up the pages, then leave
Go right and halfway down the intersection and enter 1A
Pick up the pages in 1A.
Exit to 2F. Go up, then all the way left, then exit up and go upstairs to 3F
Enter the first door (Reference Room)
Cutscene – get baby statue
Exit, then walk right onto the pentagram – as long as Satoshi is on the opposite pentagram (and he should be) there will be a cutscene.
Satoshi
You now have both statues in your inventory
Go right and down the stairs to 2F and pull the switch
Backtrack upstairs, enter the open stall in the Girl’s Bathroom, and exit the Custodian’s Closet
TEMP SAVE
Walk down – cutscene
You have one minute to make your way out of the water – wind your way around to the top middle. If you reach the top right corner you will be teleported to the beginning again, so don’t get too close to the top right corner.
Assuming you saved Naomi, you can save over that temp save. Otherwise, reload and try again
![]() Don’t Even Want to Imagine unlocked
Don’t Even Want to Imagine unlocked
Go left and up the stairs to 2F East
Go right at the intersection and put both statues on the pedestals
Enter the new door – cutscenes
Go back to 1F, picking up the Black Cat Plushie on the way to the stairs
Walk right and cross the bridge to Second Wing – cutscene – get Principal’s Key
Enter Second Wing
Walk left into the stairwell and go up all of the stairs
Unlock the door and enter Principal’s Office
Pick up Sachiko’s Tongue from desk
Search the wall just left of the two cabinets to reveal passage, then enter it
Ayumi
You are on 3F
Enter Reference Room – cutscene
Exit, then go down to 2F – cutscenes
Walk down to a new screen, then down and right and enter a door (???? Room)
Enter the other side of this room
All right, let’s go
![]() Parting Words unlocked
Parting Words unlocked
Keep going
Satoshi
You are in a bomb shelter
Go left, then up
Path: Rx2 / L / Rx2
Go right and hit the switch
Go down, past the intersection, and hit the switch at the end of the path
Go back to the intersection, turn right, then follow the path and hit the switch
Backtrack, cross the bridge you just made, and hit the switch
Backtrack, cross the new bridge (center screen) and hit the switch
From this switch, go up, left, and up to the save candle, then continue up
Path: Rx2 / U / Lx2 / U / Rx2 / U / Lx2 / D / L / Dx2 / L / Ux4 (if you mess up, you’ll just fall into a room directly below this – you passed the entrance to it when you passed the save candle)
Follow the path into a new room – cutscene
Look at everything in the room until a cutscene (if the portraits are stuck on screen, they’ll disappear at the next cutscene)
Go up and right, following the blood
At the T-intersection, go left
As Ayumi, exit the room
Continue up and follow the path.
![]() The Path Back Home unlocked
The Path Back Home unlocked
SAVE AT THE CANDLE
Follow the path
Offer Sachiko’s Tongue and Black Cat Plushie (Yes / No / Yes / No)
Chant x6, then Don’t Chant
TEMP SAVE. This upcoming part is timed in 19 second increments – you have 7 rounds to get out.
Exit the room and follow the path down and to the T-intersection, then continue down the T and follow the blood. Continue down through the area with the boxes you had to navigate (probably quicker to just fall through the floor and climb out). Continue down past the save candle, all the way right, down, left at the intersection, up, then follow the path to the tables.
Path: Rx2 / L / Rx2, then continue straight down until you’re back inside the school (if you fell at the tables, climb out and just go down through the door)
In the school, go all the way right, then all the way down and exit right
Credits – ![]() Homecoming unlocked
Homecoming unlocked
Chapter Select – Extra Chapter A
By following this walkthrough, you should have unlocked extra 1, 2, 4, and 6 in Extra A and 12 in Extra B. Load them up in order and play them. Some have gameplay, some are just text. Clearing some will unlock others; read those as well.
Clearing one will unlock ![]() Better Read than Dead and seven will unlock
Better Read than Dead and seven will unlock ![]() Halfway Point. Extra 4 will unlock Student Gathering Hub . Extra 13 will unlock Flirt With Fear .
Halfway Point. Extra 4 will unlock Student Gathering Hub . Extra 13 will unlock Flirt With Fear .
Extra 1
Walk all the way left, then down
Pick up Chihaya’s Pouch
Try to leave, talk to the soul, then leave.
Sure thing!
Go left and enter Girl’s Lavatory
Check stalls in order (left to right): 1 / 2 / 3 / 4 / 3
Take them – get Superstar Sunglasses
Go back to the Boy’s Lavatory and offer the sunglasses
Exit, go right (ignore the red soul) and downstairs to 2F
Go all the way down and talk to the red soul
Continue down into the 2F/1F stairwell
Pick up the Distinguished Glasses on the banister
Backtrack to the Boys’ Lavatory and offer the glasses
TEMP SAVE
Exit, then walk right. Four more red spirits will appear. You want to track the one that starts furthest right (just below the stationary one) – if you lose track, just reload the temp save (though you can guess incorrectly a few times before dying). Talking to it gives you the Infirmary Key
Go down to 2F, all the way down and open the door on the right
Walk right and pick up Feit Hat
Walk left for cutscene.
Check left stall, then leave
Extra 2
Go downstairs and check corpse
Go back up one flight of stairs and exit right
Walk right and enter the top door (Boys’ Lavatory)
Walk left, then exit
Exit right to 1F Entranceway
The rest of the extra chapters in Extra Chapter A are just text; get through them. Clearing chapter 6 unlocks chapter 9; make sure to read it as well
Chapter Select – Extra Chapter B
Extra 11
Go up across the board, then all the way right (ignore the red soul) and upstairs to 3F
Walk left and enter Boys’ Lavatory
I didn’t do a walkthrough for Extra 12; Extra 13 is needed for trophies so playing Extra 12 is a waste of time.
Extra 13
Talk to the souls
No
Go all the way down, down the stairs to 1F, then right to the intersection. – ![]() Halfway Point should unlock now.
Halfway Point should unlock now.
Finally, it’s time for the new chapters. They’re located in Chapter Select under Extra Chapter C
Extra 15
Go up the stairs to 3F
Enter the first room (Reference Room)
Look at the black area
Read the notes just left and up-right of the black area (they should both say different things)
TEMP SAVE
Exit the room (if Yoshiki doesn’t talk before leaving, you’ve missed something)
Avoid the red flames and exit down to 2F – ![]() Red Spirits unlocked
Red Spirits unlocked
Go up to a new screen
Go all the way up, but don’t exit
TEMP SAVE
Go right until cutscene
Avoiding the flames, go all the way down to 1F (there’s one near the exit; watch out for it)
![]() Teardrops and
Teardrops and ![]() After Effect… unlocked during cutscene
After Effect… unlocked during cutscene
Extra 16
Check the computer x3
Check the right bookshelf
Check computer
![]() Social Distancing unlocked
Social Distancing unlocked
Look at cabinet in top left
Look at door behind cabinet
Look at blackboard
Look at top right door
Read note on wall next to door
![]() Contacting Heavenly Host unlocked
Contacting Heavenly Host unlocked
There are four desks in the front row. Hide under the second one from the left (from the starting position, walk down, then pass two desks and hide under the third)
Walk up, cross the board, then pick it up
Walk up and right and enter 2A
Pick up Ryoka’s student ID
Walk to top right corner
Walk right and enter the next room (3A)
Walk as far down as you can – cutscene
Walk right and up, then up to 3F
From the stairs, walk all the way left and enter the Girls’ Lavatory
Walk left and check the closed stall
When the timer starts, hide in the stall, then choose YES
Go as far down as you can (cutscene midway), then enter the door on the right (Infirmary)
Check Ryoka
Cutscenes – ![]() Geranium unlocked
Geranium unlocked
Finally, ![]() All Said and Done! Congratulations!
All Said and Done! Congratulations!
