

Trophy Roadmap:
Difficulty: 3.5/10 (This only pertains to the difficulty of the trophies, when it comes to the time and knowledge required to 100% this game, it is a solid 6.5/10)
Estimated time to 100%: 255 Hours (Playing for 3-4 hours per day for 75 days)
Trophies: 91 ![]() 0 /
0 / ![]() 8 /
8 / ![]() 26 /
26 / ![]() 57
57
Missable trophies: None
Glitched trophies: None
Difficulty related: None
Introduction:
Welcome to the Warframe (PS5) trophy guide!
Space ninjas, incredibly fast movement, plethora of weapons and a vast variety of play styles; if that’s what you are looking for, then Warframe is sure to satisfy all of your cravings. Released in March of 2013, this free to play, third person online multiplayer shooter and action RPG that has captivated the fancy of millions of players.
You can fly in this game, you can wield weapons which can cause massive destruction, or you can hop on a floating skateboard to fulfil your Tony Hawk fantasies, help in nature conservation to make David Attenborough proud and have your own pet doggo or kitty. Woof-Woof.
Roadmap:
First of all, this game is heaps of fun and you’ll get most of the trophies just by playing the game. So, just chill out, play the game and close this guide down, just kidding.
This guide is here is to help you get that elusive and legendary, the holiest of holy 100% trophy completion in Warframe as fast as possible. The way this guide works is that all the trophies will be listed in the order they were added. So, base game first then DLC 1, DLC 2 and so on till DLC 32.
This means you will find doing all of trophies in the order of their release impossible. My advice would be to focus on specific ones rather than doing them in order. I have also included some additional Tips & Strategies at the end of the guide, for those needing them.
Let’s get you started on this journey, Tenno.
Links to Sections:
Game Basics / Tips & Strategies
Base Game Trophy Guide
DLC Update 1 / DLC Update 2 / DLC Update 3 / DLC Update 4
DLC Update 5 / DLC Update 6 / DLC Update 7 / DLC Update 8
DLC Update 9 / DLC Update 10 / DLC Update 11 / DLC Update 12
DLC Update 13 / DLC Update 14 / DLC Update 15 / DLC Update 16
DLC Update 17 / DLC Update 18 / DLC Update 19 / DLC Update 20
DLC Update 21 / DLC Update 22 / DLC Update 23 / DLC Update 24
DLC Update 25 / DLC Update 26 / DLC Update 27 / DLC Update 28
DLC Update 29 / DLC Update 30 / DLC Update 31 / DLC Update 32
Introduction to the Game:
You’ll start off with the Awakening Quest, it is a tutorial quest wherein the game will introduce you to the game’s controls and mechanics. You start off by picking your first warframe and there are three options available to you. Each warframe has 4 active abilities and a passive ability.
- Excalibur: He is your all rounder warframe with a focus on sword abilities, your space samurai in a nutshell and he was designed specifically with new players in mind. His passive grants +10% attack speed and +10% damage bonuses for certain melee weapons like the Skana. His active abilities include a sword of light, a blinding flash of light, launching javelins towards enemies and a dash while slashing enemies with the sword of light or the Exalted blade.
- Mag: This is the frame that I picked when I started my warframe journey mainly because of her relatively high shields and her crowd control abilities. Her passive is helpful to new players since it picks up stuff on the ground when you bullet jump(L1+x) so less worrying about missing resources, mods etc and focusing more on enemies. Her active abilities include a pull ability which, as the name suggests, pulls enemies towards her, stunning them and putting them in melee range for you. Other abilities include crush, polarize which depletes enemy armor and shield and creates shards healing allies touched by the pulse and become deadly when used together with magnetize, Mag’s second ability.
- Volt: Warframe’s electric boy is third warframe you can choose. He has the same amount of shields as Mag but better health while having less energy in return. His passive provide bonus electricity damage to your next weapon attack or ability cast when you traverse. His active abilities include gaining a speed boost for a short period of time along with allies, launching a shock projectile which chains to nearby enemies, an electric shield for cover and a discharge ability which paralyzes enemies along with dealing electric damage while shocking approaching enemies.
Now, pick one and proceed through the quest. Soon, you’ll get to pick some starter weapons, pick anything since they won’t be with you for long and are only for increasing your Mastery Rank. After you have completed the first tutorial quest, you will be tasked to do a bunch of missions on the planet earth that serves as an extended tutorial quest, called Vor’s Prize, which introduces you to some game modes of Warframe. Missions will appear as flashing white x marks (Non-quest missions, which you haven’t done will emit a white pulse) on the planet earth when you enter into navigation, you can only proceed once you have completed the flashing ones as the path/mission node will be dark till you complete the node before it. and they will include mission types like spy, capture, rescue, exterminate etc.
Completing these missions will grant you several upgrades to your orbiter (spaceship, to put it simply) like access to foundry, the market, mod upgrades etc. You’ll earn resources like ferrite, rubedo etc which will be useful for crafting.
After you have done the extended tutorial, the game opens up for you. Now, let’s move on to the good stuff, cheats. Lol, just kidding, time for trophies. We will start with trophies from the base game. The base game trophies act as a guide for familiarizing a new player on what the game has to offer. Don’t worry everything will be covered thoroughly leaving no chance of any confusion.
Game Basics:
- Mastery Rank – Mastery rank, abbreviated as MR, is integral to the game and acts as a gateway for most of the things that Warframe has to offer. You need mastery rank for utilising weapons and building them, unlocking quests, to trade with other players, having a higher mastery rank will increase the amount of Standing you can earn in a day, the amount of focus you can earn and a whole lot of other stuff. You get mastery points by ranking up warframes, weapons, companions and archwings and also by doing the mission nodes on the star chart as well as by completing the junctions. It will be easier for you to earn the Standing trophies if you have a high MR due to the increase in the daily cap resulting in more standing that can be earned daily. Ranking up weapons, sentinel weapons and archwings will give you 100 mastery points for each rank gained till you reach Rank 30, 3000 points in total. As for warframes, companions and K-drives, ranking them up will give you 200 mastery points for each rank gained till you reach Rank 30, 6000 mastery points in total. This is for just one item. You also get mastery points from each railjack intrinsic you rank up. You need 2,500 mastery points to reach MR 1, 7,500 mastery points to reach MR 2 and this requirement keeps increasing with each successive increase in MR. There are mastery rank tests that you have to undertake before ascending to a higher MR. There is no test requirement for unranked to MR 1 but from there on, MR tests are required. These test basically measure what you have learned in the game i.e. testing your accuracy, your movements, stealth etc. You can only undertake one MR test in 24 hours and if you fail your MR test you’ll only be able to attempt after 24 hours. Once, you unlock relays you’ll able to go to Cephalon Simaris (New Strange quest) and practice the MR tests there before undertaking them. It is highly recommended that you practice before undertaking the test. Note: Selling a rank 30 item and buying it again won’t give you mastery points but you can get mastery points from different versions of an item like a prime version of a normal item.
- Mods Guide – They are your savior, bow at their feet and marvel at their importance. Reaching rank 30 with an item will not make you that much stronger instead it is the mods which determine your strength, the damage that you deal, the strength of warframe’s abilities, the duration of your abilities and so many other factors. Initially, you’ll get flawed mods, they look like glass with a crack on it, when you do the extended tutorial. Do not upgrade them, they will be useless since you will start getting normal versions right after you complete the extended tutorial and start doing normal missions.
- Normal Mods are divided into 5 rarities which are Common, Uncommon, Rare, Legendary and Crystal (Riven mods). You don’t need to worry about Legendary and Crystal mods, you’ll get them later on in the game and they are acquired in different ways. We’ll focus on only the first three here. A higher rarity mod doesn’t always mean it is better, the stats on the mods are more important. A mod can be upgraded by using endo and credits in your orbiter, the max upgradable rank being 10, and it depends on the mod. It is indicated by the number of empty dots at the base of the mod. Mods come with a given polarity and drain (capacity) and they might have a special icon right at the top which can indicate an Aura, Stance Mod etc. As you rank up a warframe, weapon etc your mod capacity will increase until it reaches a maximum of 30 which indicates that you can, basically, have mods installed where their combined drain/cost is not more than 30. This mod capacity can be doubled by using an Orokin reactor for warframes, Archwings, Companions etc and an Orokin Catalyst for weapons. These are quite rare so use them judiciously. You can also use an Aura mod in the Aura mod slot or a Stance mod in the Stance mod slot to increase capacity for a Warframe and melee weapons respectively. You can breakdown unwanted mods at the Mod station or sell them for credits and also sell some hard to get mods for platinum. Your warframe or weapon or your companion might have a polarity when you build them or you can use a forma to add a polarity, so if you put in a mod which has the same polarity as a slot on your warframe, the polarity icon will turn green and the drain/cost will be reduced by half but if you put a mod in a slot which has a different polarity then it will turn red and increase the drain/cost by imposing a penalty. Straight up damage mods for weapons like Serration, Point strike and mods like Vitality, steel fiber are important for warframes early on.
- Clan – Yes, Warframe has a clan system in place and the way this works is every clan has its own dojo which houses several rooms and can even have a dry dock. It is highly beneficial to join a clan as you can get access to a variety of warframes, weapons, archwings etc which you won’t find outside of a Clan dojo. Don’t forget the social aspect of it, playing the game with others can make your experience so much better as well as you can receive mentoring from your clan mates as well. It really is a game changing experience and I would strongly recommend that you join a clan. You can either find clans by asking in the recruit chat or on the official Warframe forums.
- Never ever sell the weapons/items that you get from doing quests, buy extra storage slots if you have to but don’t sell them. Since, to acquire them, once again, will take you ages and I mean that literally.
- Boosters – You’ll get boosters like Resource, Credit or Affinity from a variety of sources and of differing duration like Daily login reward, visiting a Relay and getting blessed by a MR 30 player etc. There is a difference between a absolute booster like Resource booster which doubles the amount of resources you get vs a Resource drop chance booster which doubles the chance of getting resources. Now, I’ll explain how to use three most important boosters efficiently: Credit Booster – If you are a player with no access to the Profit Taker Orb in Orb Vallis(You need Rank 5 with Solaris United to attempt the Profit Taker bounty), your best bet would be The Index on Neptune (one of the Planets you’ll unlock later on). There are 3 types of investments you can make and these are Low Risk where the wager is at 30,000 and you get a profit of 75,000, Medium Risk where the wager is at 40,000 and you get a profit of 135,000, and finally High Risk where the wager is at 50,000 and you get a profit of 200,000. Keep that in mind, the difficulty increases along with the Risk and to earn a profit you need to bank a certain number of points in each of the three modes. Railjack missions are also good for credit farming and endo, Sover Strait for example. For even newer players doing missions on Earth can be rewarding as you can get about 30,000 credits from them. Resource Booster – Use this for resources like Orokin cells (Saturn and Ceres best), Plastids (Uranus and Saturn, best), Oxium (Io, Jupiter) etc. Affinity Booster – Use this for ranking up your weapons, warframes etc and for focus farming. For ranking up, Hydron on Sedna is your best bet if you can’t handle Elite Sanctuary Onslaught. Since Sedna is the last planet on the star chart, Helene on Saturn or the regular Sanctuary Onslaught are also a good way to rank up items for inexperienced players.
- You can monitor the progress of your trophies by pressing options button on your ps4 then going to Profile and navigating to Trophies section. Each trophy will be listed individually to allow easy trophy tracking.
- Platinum – It is the premium currency of the game and it a tradable currency. You get 50 platinum when you are starting out in the game. You can get 100 more from playstation plus booster pack.
- Don’t waste your platinum on stuff like cosmetics or buying resources, save it for Warframe and Weapon slots and for some hard to get mods and focus lenses. You can’t trade with the platinum that the game gives or the platinum that you get from ps plus booster packs, so if you want to trade you have to earn platinum or you can trade by offering them an item. There are two ways to seek players to trade: 1. The in-game trade chat through which you can advertise if you want to buy an item or sell it. 2. The Warframe Market, it is not an official market by the developers but many players use it. How it works is, you can advertise the products you want to sell or you can post a request to buy an item you want. There is a direct message system in place so you can contact a person selling an item that you want or vice-versa. Check the warframe market’s website on prices of items so that you don’t get ripped off by someone while trading.
I wish you luck on your Journey, Tenno.
If you liked this guide, you’ll find more on our site.
You can also chat to our writers by joining us on Discord with this link – Discord Invite
Trophy Guide:
 Reach Rank 30 with any Sentinel. |
You will get your first sentinel’s blueprints, Taxon, when you complete the Venus junction. Build it in the foundry and you’ll have access to your first sentinel. Complete missions with the sentinel equipped to rank it up by earning Affinity and reach rank 30 to pop the trophy.
Reach Rank 30 with any Longsword or Dual Short Blades weapon. |
If you chose the Skana as your starter melee weapon then just rank up that weapon. If you didn’t pick it as your starter weapon, you can buy Dual Skana (cheaper to build in terms of resources than the normal Skana) blueprint from the market as an alternative, make it in the foundry and rank it up.
Reach Rank 30 with any Gauntlets or Hand-to-Hand weapon. |
The best option is to buy a built Mk-1 Furax from the market for 15,000 credits. Level up the weapon to rank 30 to pop the trophy.
Reach Rank 30 with any Dagger or Dual Daggers weapon. |
You have two options available: 1. You can get either daggers’ blueprint after completing the Stolen Dreams quest or 2. Buy the blueprint of Fang from the market for 20,000 credits or you can get Fang’s blueprint after completing Pluto to Sedna junction.
Reach Rank 30 with any Heavy Axe, Heavy Hammer, or Heavy Sword weapon. |
I used the Fragor to get this trophy, a heavy hammer. You can get its blueprint right after you complete the Earth to Mars junction, which you have to do anyway to progress further.
Reach Rank 30 with any Scythe, Pole-arm or Staff weapon. |
The Mk-1 Bo is your go to weapon for this, which is one of the two melee starter weapons. Alternatively, you can buy a built one from the market for 15,000 credits.
Reach Rank 30 with any Boomerang, Throwing Discs or Throwing Daggers weapon. |
Mk-1 Kunai would be my recommendation, which you can pick along with the Lato as your starter secondary weapon. Alternatively, you can purchase a built one from the market for 15,000 credits.
Reach Rank 30 with any Pistol or Akimbo Pistols weapon. |
Use the Lato if you picked it as your secondary starter weapon otherwise you can buy a built Lato from the market for 10,000 credits.
Reach Rank 30 with any Rifle or Machine Gun weapon. |
If you chose the Mk1-Braton as your starter weapon, use that or you can buy a built Mk1-Braton from the market for 15,000 credits.
Reach Rank 30 with any Bow weapon. |
Use the Mk1-Paris (starter weapon choice) or buy a built one from the market for 15,000 credits
Reach Rank 30 with any Shotgun weapon. |
Buy a built Mk1-Strun from the market for 15,000 credits for this trophy.
Revive 10 allies. |
You’ll need to do 100 revives for ![]() Field Medic, check it for more details.
Field Medic, check it for more details.
Apply 4 different Mods to a single weapon or Warframe. |
You must be somewhat familiar with mods now after reading the Mods Guide section in the Game Basics. This is very easy to do:

This is a level 30 warframe with no mods installed.

Now, install any 4 random mods to pop the trophy.
Reach Rank 2 with any Warframe. |
This will be the first trophy that you will unlock. Pretty easy to do and you’ll just get it by playing the game and earning enough Affinity to reach Rank 2.
Solve 10 Ciphers. |
You will be introduced to ciphers in the extended tutorial question when the game asks you to embark on a spy mission. They are simple to do and have a countdown timer (can be overt or hidden), they can either ask you to connect all the lines or unlock all the bells. Solve 10 of either to get the trophy, this will be unlocked by just playing the game since spy missions are a very common mission type.
 Play for 10 hours. |
You’ll get this naturally by playing the game.
Update 1
Get 100 kills in a single mission. |
Play endless mission types like Survival and Defence to get this trophy and as mentioned in the Tips, you can check your trophy progress by going into profile, navigating to trophies and see the progress of the trophy that you want.
 Revive 100 allies. |
This will take some time to get unless you can ask a person to help you boost this. Kubrows and Kavats don’t count towards this trophy. You can boost it by going to high level missions where it is easier to die and revive your teammate/s. Otherwise, trawl the early missions especially the boss fight since you can find new players who need reviving.
Update 2
Build an item in the Foundry. |
See ![]() Scientist below.
Scientist below.
Build 20 items in the Foundry. |
You’ll get this trophy by playing naturally since you’ll craft weapons for other trophies, increasing mastery rank, Warframes and also craft other gear for story progression.
Update 3
Sell 10000 credits’ worth of items. |
Sell the weapons after you have reached rank 30 with them, they can sell for 2,500 credits or even more.
Note: You should do this only for weaker weapons like Afuris, Lato, the MK1 weapons etc. Do not sell any items you get from void fissure missions for credits. Also, keep in mind that some of the weapons can be used as crafting ingredients for other weapons, so, keep track of that.
Earn 100000 Credits. |
Again, you’ll get this naturally as credits are awarded from successfully completing missions.
Update 4
Kill the boss in the Mercury region and get to extraction. |
The boss of the Mercury region is Captain Vor, who will be a recurring character. The fight is simple enough, he will try to keep you out melee range and he will deploy a sphere shield every time you reduce a third of health which makes him invulnerable and summons grineer troops to his aid. Just wait out his sphere phase and start attacking him, don’t focus too much on the grineer minions. You’ll be rewarded with parts of weapons Seer, Miter, Twin Gremlins as well as parts of warframe Frost.
Kill the boss in the Uranus region and get to extraction. |
Tyl Regor, boss of Uranus, is a tricky one as he exclusively uses melee weapons and has high attack and sprint speed and he can also teleport around the fighting area. He has three phases, the first one involves damaging him until he loses 1/3rd of his health and this triggers his second phase.
In the second phase, he will smash his fists at the glass ceiling and cause water to fill up in the fighting area. He will vanish and won’t appear until the player has defeated all the minions spawned by Tyl Regor, and once he appears damage him until he loses another third of his health.
The third phase begins the same way as the second one, he will punch the glass ceiling, flooding more of the arena and making you seek foothold on the top most level. The water will now deal electric damage so watch out for that. Defeat the minions spawned by Tyl Regor until he appears again and kills him. Reach extraction and unlock the trophy. Defeating him will reward you the parts of the Equinox warframe.
Update 5
Kill the boss in the Venus region and get to extraction. |
Jackal is the boss of Venus and is a four legged mechanical creature. Its legs are vulnerable to damage so that should be your focus, every time you destroy one of its legs, the game will ask you to perform a mercy kill by pressing square, press it to progress further. Now, it is just rinse and repeat; destroy one of his legs and mercy kill him till he is dead. He has an attack where he uses a ceiling fan pattern laser, which is initially harmless when blue coloured but when it turns red, it damages everything in its path and you can avoid it by moving along the laser pattern and sticking to the safe sides. Get to the extraction and pop the trophy. You’ll get parts of the Rhino blueprint as well as blueprints of Stropha and Stahlta.
Kill the boss in the Sedna region and get to extraction. |
Kela De Thaym is the boss of Sedna and is found on Merrow node. To access this node you need to first earn 25 judgement points. You can earn them by playing Raathum Mission Arena on Nakki, Yam, or Vodyanoi on Sedna wherein you have to earn points by killing enemies without you dying. So, quite similar to The Index on Neptune.
Once you have earned the required 25 points they will be consumed when you start the Merrow mission node. You will need to stand on circular pads on the floor and shoot green lights that appear behind a spinning wheel on the wall to start the boss fight. Beware of the boss’s Orbital Strike and avoid it by jumping to other platforms. After the orbital strikes are complete, you will have a short period of time to stand on floor pads and shoot the green lights that appear just like you did earlier to start the next phase of the encounter. Repeat this until you defeat the boss, extract and the trophy is yours. You’ll get parts of Saryn and twin kohmak blueprint as well as some mods from this boss.
Update 6
Complete 10 missions without any primary or secondary weapons equipped. |
The best missions for this trophy are Spy and rescue missions, these missions involve little to no fighting which makes it a breeze to get this trophy. Make sure to do these missions quietly.
Deflect 1,000 projectiles with your melee weapon. |
This will be achieved naturally if you keep using melee weapons. When enemies start firing at you just face them with your melee weapon out and this way you can deflect the projectiles. You don’t need to press a button to deflect the projectiles, it is done automatically if you have a melee weapon in your hands.
Update 7
Earn Battle Pay from 5 unique Invasions. |
Invasions are accessible from the navigation menu then scrolling through the options on the top right and choosing invasions. You have to select a side and then do three missions to earn battle pay once. So, in a grineer vs corpus fight, if you side with the corpus you’ll have to complete 3 missions with them and you can monitor your progress by selecting the same invasion again. Therefore, to get this trophy you will have to do 5 unique invasions, 15 missions in total.
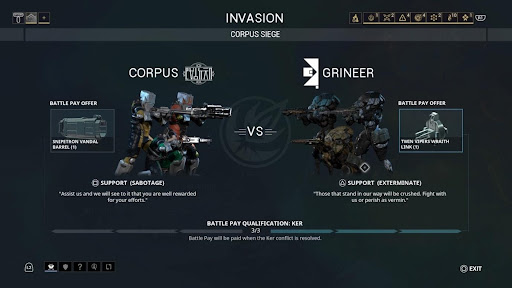
This is one invasion where I will earn 1 battle pay reward.
Complete 5 missions for a Clan contesting a Dark Sector. |
The trophy’s description is misleading since they removed the clan aspect of it some years back. Now, you just have to do 5 dark sector missions to unlock this trophy. Some dark sector mission nodes are Tikal and Coba on Earth. There are dark sector missions on other planets as well. Dark sector missions give more rewards as compared to normal missions and are endless in nature.
Update 8
Complete a Hijack mission without allowing the payload to travel backwards. |
In this type of mission, you have to escort a payload to the extraction point and you’ll be attacked by enemies while doing so. The payload moves forward by using up your shields so make sure that the warframe you have equipped has decent shields. It is recommended to this mission in a group as you can rotate when a person has depleted their shields to ensure the payload keeps on moving forward. The earliest Hijack mission is on the planet Ceres.
Complete an Interception node and extract with the enemy capturing 40% or less territory. |
Interception is a mission where you have 4 points that can be captured. Initially, all points are red i.e. captured by the enemy, so you have to cap the point by, first, bringing it to neutral (0%) and then to 100% captured or blue. Enemies will attack all points, therefore, the recommended strategy is to do it in a group of 4 so each of you can capture a point and defend it or if playing solo bring a specter with you to help you out, that way you and your specter can each take a point. When you reach 100% total progress on the progress meter, you’ll have to eliminate remaining enemies and then you are presented with the option to extract by or play another round. Extract and you’ll get the trophy if you followed the strategy.
Update 9
Complete 10 successful Mod Transmutes |
Mod transmutes involves consuming and combining 4 mods to possibly have a chance to get a better mod. The cost of transmutation depends on the rarity of the mod so keep that in mind while attempting this trophy. I would recommend that you leave this trophy for later since you’ll need at least 120,000 for this trophy and the chances of getting something good are very very low. So, attempt this when you have enough money and mods to spare.
Successfully perform 100 stealth kills |
Use a silent weapon like a bow or use melee weapons to get this trophy. The enemies are unalerted when the red arrow on your radar is hollow and they are alert/aware when their arrow is completely red. Make sure your kills are not witnessed by the enemy and you can use some warframe to make this easier like Loki and Ivara. Loki can use his ability to turn invisible for a certain period of time and Ivara can either use a sleep arrow to put enemies to sleep and then kill them or turn invisible herself, albeit with restricted movement, to kill enemies silently.
Update 10
Score a kill with your equipped primary, secondary and melee weapons in 5 seconds or less. |
This is pretty easy to do, start with your melee weapon first and then work your way to your primary weapon. Also, if you feel that your weapons aren’t doing enough damage, you can damage the enemies first and then attempt this trophy.
Destroy 200 Corpus Crewman helmets. |
You can attempt this trophy along with ![]() No Witness in Update 9 if you’ll feel that you can’t hit the head of corpus crewmen normally. It isn’t that difficult to do and you’ll unlock it naturally.
No Witness in Update 9 if you’ll feel that you can’t hit the head of corpus crewmen normally. It isn’t that difficult to do and you’ll unlock it naturally.
You can also use the same frames mentioned in the No Witness trophy to make it easier.
Update 11
Polarize a Weapon, Sentinel, Kubrow, or Warframe |
Polarizing means adding a polarity to a mod slot or replacing an existing polarity with the one of your choice by using a Forma which you can get in some ways like opening relics, daily login, nightwave etc. This can be done to a Rank 30 item only whether a warframe, sentinel, kubrow etc. You can’t add an umbral polarity, you need an umbral forma for it which you get from Nightwave, Gift of Lotus alerts and Tesshin.
Once you polarize an item it will drop back to rank zero. You can forma an item equipped with either an orokin reactor, catalyst or a lens. However, to earn focus again you’ll have to level up your item back to rank 30 again.
Reach Rank 30 with a polarized Weapon, Sentinel, or Warframe |
After you have polarized your weapon for the first time, rank it up again to level 30 to unlock this trophy. Though, you won’t gain any additional mastery from it.
Update 12
Complete 20 waves of Defense and successfully extract |
Simple enough, you can do it on a low level mission to make it easier. Otherwise, you can ask for help in the recruit chat if you are finding it difficult to do it solo since most people extract after 10 waves.
Destroy 150 Security Cameras |
Run corpus missions for this trophy since you can find a lot of cameras in corpus missions, you can do this trophy passively while going for other trophies. No need to run missions exclusively for this trophy since you’ll get it by playing the game naturally.
Update 13
Complete 10 Void Fissure missions |
Void Fissures missions are missions wherein you open relics after you have collected 10 reactant coolant which is required to crack open a relic. You can do void fissure missions after unlocking the void fissure segment for your orbiter which you get after completing the Earth to Mars junction. There are 5 types of relics : Lith, Meso, Neo, Axi and Requiem. The items you get from the opening the relics are of 3 rarities – Common (Bronze), Uncommon (Silver) and Rare (Gold). Consult the Tips section on how to efficiently open relics.
Update 14
Complete 10 Nightmare missions. |
Nightmare missions are a version of normal missions with higher difficulty and can have up to negative 2 modifiers in a single mission. They are accessible once you complete every mission node on a planet and they are represented by a white swirl instead of a normal faction icon.
Complete any 5 Hive Infestation missions. |
These missions involve destroying a total of 3 hives. Before, you can destroy a hive, you have to destroy 5 infested tumors that will make the hive vulnerable and you have to do this for all 3 hives in a mission. Naeglar on planet Eris is the sole hive sabotage mission in the game.
Update 15
Complete any 10 missions with a Kubrow equipped. |
Completing the Howl of Kubrow quest will give you a Kubrow. Once, you get your Kubrow, equip it in the companion tab and take it to 10 missions with you, simple stuff.
Begin Genetic Lab Incubation for a Kubrow. |
Completing the Howl of the Kubrow quest will give you everything to get this trophy so do that and you’ll have your trophy.
Update 16
Survive 8 waves of Defense using only melee attacks! |
You can do this trophy along with ![]() Ride the Wave, just use your melee weapon for the first 8 waves to unlock the trophy, you don’t need to unequip your primary and secondary weapons for this.
Ride the Wave, just use your melee weapon for the first 8 waves to unlock the trophy, you don’t need to unequip your primary and secondary weapons for this.
Note: If you are doing this in a squad all of them should only use their melee weapons otherwise it won’t count for you. Also, some players reported that this trophy didn’t unlock when they had their primary and secondary equipment even when they didn’t use them. So, if you want to be 100% sure, unequip your primary and secondary.
Kill 10 or more enemies with a single explosion (Tonkor, etc) |
I used a rank 30 tonkor, you can use any other grenade launcher type weapon. Serration, heat and cold mods are recommended for this trophy if you don’t have a powerful weapon. I did it on Malva node on planet Venus, it is a dark sector survival mission. The strategy would be to use a frame like limbo, whose passive allows him to shift into the rift where he cannot take any damage nor can he damage/interact with anything, and attract the infested towards you. Once, you see that you have 10 infested around you, jump and fire the tonkor on the ground near them.
Here is a video on how to do it. The weapon used is a better version of Tonkor but you can easily do it with a normal tonkor as well.
Credits to Snowy Senpai for this Video
Update 17
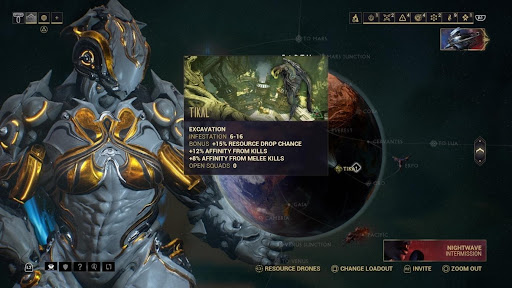
Fully unlock a Focus skill tree |
What this trophy requires you to do is to unlock all nodes in a specific focus school and there are five schools in total.
You’ll have access to focus schools and focus lenses after completing The Second Dream quest in which you’ll get to pick a focus school and it is also recommended that you do the War Within quest, which you will have to do anyway to get a gold trophy. You’ll also need to do Saya’s vigil quest in order to unlock all the nodes in a focus tree. This is something that you should definitely attempt a bit later into the game as this process will speed up with better gear.

In this picture, you have 10 nodes available in the Vazarin focus school, you have to unlock all of these once to get the trophy. You are not required to max out all nodes. The fastest schools for this trophy are Naramon and Unairu, requiring 485,000 Focus each to unlock all nodes. Now, I will tell you how to farm focus effectively and efficiently.
Focus Farming – My recommendation would be to do this when you have finalized a Warframe and weapons which are strong enough to kill the highest level enemies. To earn focus you will need a focus lens which converts the affinity earned by you to focus by a certain percentage.
There are 4 types of Focus lenses: Regular lens which converts 1.25% of excess Affinity earned into focus, Greater Lens which converts 1.75% of excess Affinity earned into focus, Eidolon Lens which converts 2.25% of excess Affinity into focus and finally Lua Lens which converts 3.25% of excess Affinity into focus. You can get regular focus lenses by doing bounties in Plains of Eidolon, Orb Vallis and Cambion Drift. For a greater lens, you have to purchase its blueprint from the Market and you need 4 regular lenses of one school to craft a greater lens of that particular school. You can get Eidolon lens blueprint by doing the highest level bounties in the Plains of Eidolon but the drops chances are abysmally low so it is recommended that you buy a blueprint from another player for 10 platinum each. Lua Lens can be acquired from the disruption mission Apollo on Lua and it also has a very low drop rate. It is a no-brainer that having a better lens will make this process much faster. You will, initially, have a daily focus earning limit of 250,000 and you will get 5000 more capacity for every time you increase your Mastery Rank. Now, you need to decide on which warframe and weapon you want to put a lens on because you can only earn focus from Rank 30 Warframes or weapons so it is recommended that you play the game enough to learn what weapons and warframes are good for you.
Let’s learn how Affinity earned is divided: If you get kills using only your Warframe’s abilities then 100% of the Affinity earned is given to the Warframe, fully converting the focus using the lens on your Warframe. If you get kills using your weapons, there is a 50-50% Affinity distribution respectively for your Warframe and the Weapon you used to get a kill, mind you that if there is no lens on the Warframe then this other 50% Affinity earned is lost. Finally, if your allies get a kill, the Affinity distribution for you is as follows: 25% to the Warframe and the rest 75% distributed evenly between all of your equipped weapons. So, if you have only 1 weapon equipped and it has a focus lens on it, the weapon will receive the rest 75% Affinity. Therefore, it is advised to have a weapon equipped with a good lens. This is why it is recommended that you carefully choose the Warframe and Weapon to put a lens on, since good lenses are not easy to get your hands on. Keep an eye out for Convergence orbs, which are yellow glowing orbs that multiply the Affinity gained by 8 times for either 45 seconds or until you die whichever is earlier.
There are two fastest options to earn focus: The first option is doing the exterminate mission Adaro on Sedna. I used Ivara Prime (You can use normal Ivara as well) and Guandao Prime for this mission and both had a Vazarin Eidolon lens on them. The reason I used Ivara is because of her abilities, her first ability allows you to use 4 types of arrows of which one is a sleep arrow which you can use on enemies and it has an area effect. Once the enemies are asleep and there are no witnesses, stealth kills the sleeping enemies. Why stealth kill? The reason is that when you perform a stealth kill you get a 100% bonus Affinity per stealth kill for 30 seconds and it stacks up to 500% after 5 successive stealth kills. This timer refreshes after each successive stealth kill. This timer and bonus will reset if you kill an alerted enemy, so keep that in mind. Her third ability makes her invisible although this makes her movement slow but you can remedy that by equipping mods that grant faster movement speed and she will also lose her invisibility if a bullet jumps or fires a weapon with alarming noise. This method will take some practice as you have to be quite fast and kill enemies in one hit which is why I used a melee weapon. I earned about 23,000 Affinity per run when I was practicing and it took me 15 minutes or so. I also had an Affinity booster to help me out.
The second method is by playing Elite Sanctuary Onslaught which you’ll have access to from Cephalon Simaris or from your navigation tab. In this mode, you are transferred to a large room-like area where you have to kill enemies as fast as you can to maintain efficiency for 2 minutes and 30 seconds after which a conduit appears which will take you to the next zone. This is an endless mode so you can go for as long as you can but the difficulty also spikes with each zone. There is not much else to it, kill enemies as fast as you can and earn Affinity. Recommended Warframes are Saryn because of her Spore (1st ability) and Miasma (4th ability) combo which can deal damage and kill enemies thereby giving you full 100% Affinity, meaning full focus conversion since you killed enemies using your Warframe’s abilities. Mesa is also a great choice because of the 4th ability Peacemaker which can deal huge amounts of damage thereby killing enemies and again earning you full 100% Affinity for your Warframe.
So, you can put a focus lens on either of them if you choose the Elite Sanctuary Onslaught method to earn focus as you can also get radiant relics and level up your weapons here. As for weapons, you should go with a Primary weapon which can deal huge damage in a short period of time like the explosive bow Kuva Bramma or Kuva Zarr, which is a handheld mini cannon. I tried the Elite Sanctuary onslaught with an Eidolon Lens equipped on my Guandao prime and no lens on any other stuff and I got around 21,000 focus after 8 zones of Elite Sanctuary Onslaught which lasted 20 minutes. You can get much more if you follow the suggestions listed above and you can earn even more if you have an Affinity booster. You can also do Eidolon hunts in which you get Eidolon Shards that can be converted to focus and they are not affected by the daily limit i.e. you can go over the daily focus limit.
Set 10 hostages free without triggering the execution timer |
This can be done in rescue missions and it is recommended that you use Stealth frames like Ivara and Loki to get past the warden and rescue the hostage.
Update 18
Complete The War Within Quest |
This is a main quest which gives you access to Kuva liches, daily sorties, and several in-game factions are unlocked upon completing this quest. The Quest will take you to Lua, Jupiter, Sedna, Earth, and Kuva Fortress. The requirements of this quest are: MR 5, Second Dream quest completed and also complete the Sedna junction at Pluto. The first few nodes are simple, you asked to investigate a reservoir on Lua, you’ll encounter an intruder there. Lotus thinks it is Tesshin and asks you to track him down which will take you to Jupiter, Sedna and the Kuva Fortress. At the Kuva fortress you’ll go down an elevator (after you have activated by inserting three keys found in the mission) to a throne room where you’ll encounter Tesshin and the Twin Queens along with Kuva guardians. You’ll lose consciousness here as the link between the warframe and the operator is broken. Ordis will ask you to re-establish the link by using a void beam on top of the transference chamber. However, you experience a backlash losing that prevents you from using void blast for a prolonged time. Ordis will enable a purge precept and you’ll now have to detach your landing craft and escape. After this you’ll find yourself on a snow covered mountain. In this section, the game will teach you all about the operator’s abilities as you unlock them. There will be some dialogue options as well but I chose whatever I wanted. After this entire sequence is over you’ll finally encounter the Grineer Queens and you’ll have to fight Kuva guardians spawned by the Queen. These guardians are invulnerable to damage and can only be damaged by your operator’s abilities.
Remove their vulnerability and use your melee weapon/void blast to kill them (you can only use your melee weapon here). Finally, you’ll face off against Tesshin, defeat him using melee attacks and face the Grineer Queen. Use your void dash to steal the Queen’s scepter. Complete the mission and you will return to your orbiter where you can use transference. You will now go back to Earth where you interact with an Ayatan Sculpture, do the necessary steps and you’ll meet Tesshin. This completes the quest and you will receive 5 rewards for this.

Update 19
Complete Octavia’s Anthem Quest |
Visit Cephalon Suda to start the quest and it is an optional, solo only quest which rewards you with the blueprint for Octavia. It is recommended that you do War Within quest first so that you can use the operator’s abilities, you’ll need them. At first, you will be tasked to collect three pieces of the Mandachord. Once you collect them all you will be asked to build it in your foundry. Now, you will be tasked to collect songs for the mandachord. This is done by interacting with the Hydraulus, an orokin artefact. You have to add beats to the song by activating the appropriate bar positions (out of three possible) in the top row of each column as indicated by the height of the glowing blue symbols that appear on top over of the chart each time the beat passes it. After you have done this correctly, you’ll have to do this 2 more times in two separate missions. In the second mission you’ll encounter Sentients, these are pretty tough enemies who can take a lot of damage as they can become resistant to the damage you deal to them after a few hits. Here is where your operator comes in handy. Your operator’s void blast can remove any resistances that the sentients have acquired so the strategy is to damage them first, use void blast to remove resistances and repeat. After you have all three fragments, you need to use the Hydraulus one last time to awaken cephalon suda, you’ll also be required to boost the signal using an orokin tower. These bits are difficult and it is advised to have good weapons and a tanky warframe since there will be a lot of sentients spawning.
After you are done, you will be asked to speak with Cephalon Simaris where Simaris will spawn you in Suda’s datascape. It has a huge mandachord and Hunhow in the middle. You need to recreate the music of Octavia’s anthem inside the datascape’s Mandachord in order to defeat Hunhow. Consider this an extension of Hydraulus. You have to remove the red energy pillars by standing on them and get the blue music notes by standing on pillars with bright yellow balls. If you step on a dark brown platform, it will emanate a red energy pillar which you have to stamp out by getting on it again. You’ll have to do this three times, one for each bar of health hunhow loses. Complete this final stage and you’ll be rewarded with Octavia’s blueprint.
Update 20
Complete the Chains of Harrow Quest |
Check if you meet the conditions and if you do start the quest from your codex. You’ll be rewarded with Harrow’s blueprint after completing the quest. First mission asks you to investigate the area and protect a red veil member from hostile red veil members. Extract and then you’ll be tasked to meet Palladino, the person you rescued earlier. Next mission is more of the same until the end where you encounter a manifestation of Rell. After you fail to destroy it, you’ll be asked to extract and meet Palladino. For the next three missions make sure you have enough kinetic siphon traps, you can buy them from Cephalon Simaris. You do essentially the same thing for the next three missions: trap and defeat all three of Rell’s emotions using Kinetic Siphon traps, then extract once the objective is complete. Once these missions are done you will now go to the void and meet the Warframe in which Rell’s consciousness is imprisoned. You need to destroy the chains binding the Warframe using your operator’s void beam. This is done in three phases, where you’ll be attacked by Red veil fanatics in each wave. After all the chains have been destroyed, Rell will finally appear and Palladino urges him to be free.
Update 21
Complete the Saya’s Vigil quest |
This quest can be started in Cetus. You need to find Saya’s husband. It is an easy quest, tasking you with finding Shatter-lock shark to piece together the mystery of what happened to Saya’s husband. Completing this quest will award you the blueprint for Gara.
Kill 100 grounded enemies while in Archwing Mode above the Plains of Eidolon |
This trophy does not require an Archwing, I did this with a combination of K-Drive, Dargyn and finally an Archwing. Though, using an Archwing is recommended since you will be needing it for some other trophies.
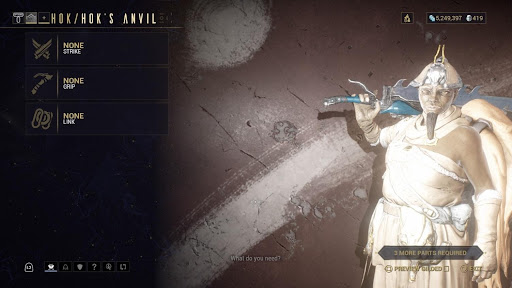
Craft your first Zaw |
You can craft a zaw in Cetus by talking to Hok. You need three components for crafting a zaw, the Strike, the Grip and the Link. It is recommended to reach at least Rank 2 standing with Ostron people as you can get the blueprints of parts of the zaws as free offerings when you rank up your standing with them. Also, you will be doing 10 bounties anyway for the Champion of the People trophy which will grant you some standing so might as well go till Rank 3.
Survive a night on the Plains of Eidolon |
Plains of Eidolon has a rotating day-night cycle with daytime being 100 minutes and night being 50 minutes long. You can check the day and night cycle by going to navigation and hovering above Plains of Eidolon node. Enter the plains a few minutes before Night time starts and spend the rest of the 50 minutes working on your Plains of Eidolon trophies like Marathoner, Tomb looter etc. Nights are dangerous in Eidolon due to the presence of Eidolon teralyst, so stay clear of it. Use a frame like Limbo whose passive allows him to slip into the rift, where he can’t be damaged by most enemies (some enemies can still attack you so don’t put all your eggs in the Limbo basket). Also, don’t start any bounty at night, that’s a big no-no. It will get you killed and your progress will reset. Once you are in the Plains, open up the map  and on the bottom right corner you can see how long it will take for dawn to break. Exit the plains when it is daytime again.
Explore all of the Eidolon Caves |
There are a total of 12 caves in the Plains of Eidolon. You don’t need to explore all of them at all, just enter them for a few seconds and then exit, this will be enough for it to register. You can combine this trophy with ![]() Plains Prospector since the caves contain many mining veins.
Plains Prospector since the caves contain many mining veins.
Here is map which shows all the caves in the Plains of Eidolon.

*The three circles are not empty, it is just that the cave icon didn’t load up when I opened the map and there is a cave in each of these circles.
Travel over 500 metres in a single slide across the Plains of Eidolon |
The easiest way to do it is to use an Archwing and fly upwards as far as you can then jump out of the Archwing while looking upwards and simultaneously pressing the slide button, L1. Do it above an area where there is a slope so that you can slide down easily. Watch this video for reference:
Defeat an Eidolon Teralyst |
You need to complete The War Within quest first to access Eidolon hunts.
This is a very difficult trophy to do solo even if you reach a high Mastery Rank. You have to have the right school of focus, the correct amp which you have to get from the Quills after reaching a certain standing plus certain warframes and specific damage dealing weapons. You can only do an Eidolon hunt at night in the Plains of Eidolon, they are giant creatures and they can easily kill you in one hit if you are not prepared. My recommendation would be to seek help from the in-game recruit chat for this particular trophy as they are people who are willing to help you out when it is your first time doing it. You can also do a public bounty that Konzu offers when it is night on the Plains of Eidolon.
Update 22
Kill an enemy from over 100 metres away across the Plains of Eidolon |
Easy stuff, just find a place where you have adequate line of sight and use a weapon like Rubico, a sniper, to make your job easier.
Travel 100,000 metres across the Plains of Eidolon |
This will take you some time to do it so I suggest that whenever you do any Plains of Eidolon trophies always travel by foot. Using an Archwing, a K-drive and a Dargyn doesn’t count towards this trophy. You can use some warframes with higher movement speed to make it easier.
Complete 10 bounties given by Ostron townspeople |
You can do bounties by talking to Konzu in Cetus, there are certain levels of bounties and they have a number of stages depending on the level/difficulty of the bounty. The easiest one will have 3 stages whereas the highest level one will have 5 stages and stronger enemies.
Update 23
Kill 100 Plains Beasts |
This requires you to kill animals that are found in the Plains of Eidolon like Condroc, Kuaka etc.
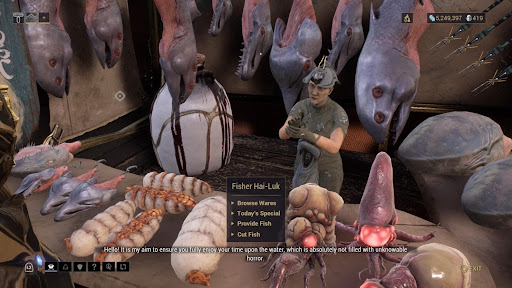
Catch 10 fish |
You have to buy a fishing spear first from Fisher Hai-Luk before you can start working towards this trophy and buying a spear requires standing so make sure you have enough standing to purchase it. You also need 30 fish oil for the Archwing launcher so catch a lot of fish and have Hai-luk cut them to get fish oil. After you have purchased the spear, equip it to your gear wheel from the Arsenal menu. You don’t need to buy bait unless you are hunting for a specific fish.
Unearth 100 Deposits from the Plains of Eidolon |
I suggest that you do this trophy with the Tomb Looter trophy as caves are a rich source of mining veins. Also, buy the Sunpoint Plasma drill from Fortuna for mining, it works everywhere and is upgradable whereas the Cetus drill is not.
Update 24
Complete “The Sacrifice” quest |
You’ll get a fully built Warframe, Excalibur Umbra by completing this quest. You can start this quest by interacting with Lotus’s helmet in your personal quarters. This quest tasks you with investigating what happened to Lotus. You’ll be tasked to investigate sentient energy on Earth then on to Lua, where you have to solve orokin ciphers. These are memory ciphers, that is, it requires the correct sequence as a genuine memory from the user, you have to search them manually. After you have solved all the ciphers, you’ll be asked to reach extraction. Once, you are back in your orbiter. Ordis will inform you that Excalibur Umbra can now be built. Build it to progress and once you try to equip it in the Arsenal, it will reject the Transference displaying sentience. A scene will appear showing an ill man on the bed with Ballas and his son by his side. After this scene is over, you have to head over to Ceres to search for Excalibur Umbra.
Once, you encounter him, use void blast on him and then use transference to take over him. This will trigger another round of memories. After that scene is over, you will pursue Excalibur in Neptune. Here, you also do the same but Excalibur will have shields now. Your void blast can damage him but is quite less, so, I would recommend that you at least get a mote amp from the Quills in Cetus which is given automatically to you by the quills. Take down his shield, stagger him and then use transference to take over his body again triggering another round of memories. Excalibur will escape again to Lua, just repeat the same steps as above triggering Umbra’s final memory. After this scene is complete, you’ll gain full control over Excalibur Umbra. Now, it is time to confront Ballas on Earth where you’ll have to fight sentients, use his radial howl ability to remove resistances from sentients. Defeat them and you’ll see a scene where Lotus appears. I won’t spoil anything else, see the rest for yourself.
Update 25
Travel over 10,000 meters on a stolen Dargyn across the Plains of Eidolon. |
Dargyn is sort of an Archwing used by the Grineer to fly around. These can be randomly found on the map and they have pilots besides them. My advice would be to be stealthy and kill the two pilots before they see you and board one of the two Dargyns. If they see you, they will run towards the Dargyn and fly off so make sure you are careful. After you have successfully stolen one, fly around and you’ll pop the trophy once you hit 10,000 metres.
Update 26
Reach top standing with Ventkids. |
This involves reaching Rank 5 or Logical with the Ventkids and the best way to do it is to participate in K-drive races in Orb vallis. There are 5 races available at a time and you can do them multiple times.
Reach top standing with Solaris United. |
You have to reach Rank 5 or Old Mate with Solaris United to unlock this trophy. You can earn standing in a variety of ways like doing bounties, conservation capture, mining, fishing, purchasing debt bonds and rescuing prisoners in normal corpus missions using a granum crown (dropped by corpus treasures), you need to complete The Deadlock Protocol if you want to use the last method to gain standing. It is highly recommended to attempt all the standing trophies when you have an Archwing as it makes the whole traversal process much faster and you can use your time more effectively. The best way in my opinion is Conservation capture, you can do one capture in 2-3 minutes and it will grant you quite a bit of standing if you perform a perfect capture. A perfect capture on a Virmink grants you 600 standing and this is at a low level, once you have access to higher level of echo-lures you can get even 2000-3000 standing per perfect capture. See, ![]() Animal Lover for more details.
Animal Lover for more details.
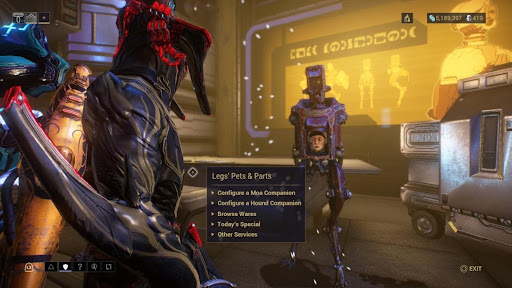
Configure a Moa companion. |
This trophy can be attempted together with the Money Can’t Buy Happiness trophy as you can get each component of a Moa as a reward for increasing your standing/rank with Solaris United till Rank 5 (max). A moa requires 4 components to build it and each component has to be built from resources available from Orb Vallis so you have to mine a lot and fish as well. After you have crafted all the components you can go to Legs to get your Moa built.
Complete all of the K-Drive races in Orb Vallis. |
You’ll get a basic Bondi K-drive after completing the Vox Solaris quest.
There are a total of 22 races to complete in Orb Vallis and only 5 are available at a given time. So, it is recommended that you keep a track of the races you have completed in order to be as efficient as possible. Pair this trophy up with ![]() Ride or Die above.
Ride or Die above.
Ride 1,000,000 meters on a K-Drive. |
This might sound daunting and it is a major pain if you do it legitimately but you need not worry as I got you covered. Watch this video where I show you how to get it easily via a glitch.
Explore all of the caves in Orb Vallis. |
Here is a map of all the caves in Orb Vallis which I have marked, use this as a reference:

Make a 50 meter jump on a K-Drive. |
You’ll get it naturally when you are completing the races in Orb Vallis. Press and hold X to determine the height of the jump and jump off a good enough height to unlock this trophy.
Update 27
Destroy 10 Raknoids in Orb Vallis while airborne. |
Raknoids are spider-like creatures found in Orb vallis and they come in different sizes. The smallest ones have a green back and can be found randomly hanging upside down from trees or near caves, you can hear them moving if you listen closely. You can also encounter Raknoids in high level bounties where one or two might randomly appear and attack you. A popular place for Raknoids to spawn is around the lake that you right after entering Orb Vallis. Again, you can do this while on K-Drive as well but at this point of time you should have an Archwing.
Complete 6 Bounties within 60 minutes while in Orb Vallis. |
It is recommended to attempt this trophy when your level is high enough if you are doing it solo and also do it on the lowest level bounty. I would advise you to recruit a party of 4 and have an Archwing to go after this trophy. For this trophy, you can do either of the first 2 bounties 6 times since they have only 3 stages each. Every time you complete a bounty do not enter Fortuna, this will reset the progress, instead talk to the person outside which hands out the bounties right outside the gates. Watch out for the spy stage in the bounty as there is a bug which makes the hackable console non-interactive when you try the same bounty for the second time. If this happens, either choose a different bounty or try again later. Having a Nechramech is also recommended as this makes it so much easier.
Update 28
Fall into Orb Vallis coolant from 275 meters while on a K-Drive. |
Coolant forms the water in Orb Vallis so what this trophy essentially asks you to do is to fall into the water while on K-Drive. An Archwing is your only option here, use it to reach the desired height and then jump off with your K-Drive equipped into the water. You don’t have to do anything else, just land on the water.
Watch this video for reference:
Complete 10 perfect Conservation captures in Orb Vallis. |
You need a Tranq rifle before you can start a conservation mission, this can be bought from the Business in Orb Vallis for 500 standing. You also need to buy an Echo lure from Business to start conservation capture. After you have equipped the tranq rifle in your gear wheel, set out into Orb vallis. Equip the rifle when you are in Vallis and open up your map, you’ll see some blue paw icons on your map, go to one and interact with the item there to start the investigation. Follow the footsteps and reach a point where you’ll be prompted to use your Echo-Lure.
Watch this video on how to get a perfect capture:
Update 29
Create a Kuva Lich |
You need to complete the War Within quest to have access to this. The way this works is that you will randomly encounter Kuva Larvlings in Level 20+ missions and this is indicated by the lighting flickering yellow while in a mission. Once you see the lights flicker you’ll have 60 seconds to kill 10 grineer for the larvling to spawn. The larvling will be indicated by a red symbol on it. After the larvling has spawned, kill it and it will kneel down. A weapon will appear over its head which shows you the weapon you’ll get once you finally vanquish your lich. Now, you’ll be asked to mercy kill it, perform the mercy kill if you like the weapon or extract and do the mission again till you get a weapon that you like. Once, you mercy kill the larvling you’ll create a Kuva Lich and the Lich will send you a message after you return back to your orbiter. This will unlock the trophy.
Vanquish a Rank 5 Kuva Lich. |
For this trophy, you need to do The War Within and the Rising Tide quest which will give a railjack. Also, you need level 5 intrinsics in any one of the 5 intrinsic classes, you earn intrinsics from Affinity earned by doing railjack missions, destroying enemy ships and from performing actions like repairing the hull when it is damaged, killing enemies that have boarded your railjack etc. You need a total of 31 intrinsic points to level up a class to level 5. So, some preparation is required before attempting this trophy, thankfully railjack missions can be done in a public lobby and you don’t need to worry about using your basic railjack that you get from after completing the Rising Tide quest. This trophy is quite hard to do and requires a good loadout, so, it is recommended that you attempt this trophy when you are able to do steel path missions. Do not, I repeat, do not attempt this trophy thinking it is easy stuff, a level 5 Lich means it is at the highest level which is not something you can defeat so easily without having a good loadout and a good tanky warframe since the Liches hit quite hard.
So, after you have created your lich it is time to hunt it. Your lich will first appear on the Planet Earth, the whole planet will have a reddish hue and you will see specific mission nodes which have now been taken over by the Lich. Your objective now is to collect murmurs which you can get by killing Thralls, which are like lich’s minions and then mercy killing them. The purpose of collecting these murmurs is to know what your requiem mods are for mercy killing your lich. Requiem mods are those which drop from requiem relics and these requiem relics in turn have a chance of dropping after mercy killing a thrall or you can get a guaranteed requiem relic from doing Kuva Siphon mission with a Kuva Flood, which are high level missions. There is also a chance to get a requiem relic from normal Kuva Siphon missions which are not as high level. You’ll need three requiem mods to vanquish a lich and you have to collect enough murmurs to know what your 3 requiem mods are. You equip your requiem mods to your Parazon and you have to have these mods in the correct order to successfully Vanquish or Capture a lich. The “fun” part is figuring out the order because the game won’t tell you the correct order, it will only tell you the names of the mods but not the order in which you have to slot these mods onto your parazon. Also, you can have only 3 mods equipped in your parazon at a given time. Now that you know your mods, it is time to get them. There are 4 requiem relics in total and each has 2 requiem mods inside them. The chance of getting a requiem mod from an intact relic is 22% which increases to 40% if you refine it to the highest tier which is radiant. Always do Relic fissure missions in a party of four to increase your chance of getting an item that you need. So, if you need a mod from requiem relic 1, ask people in the recruit chat if anyone is running the same relic. This will make it so much easier to get your desired mods. Alternatively, if you get a requiem mod which you don’t need you can trade it for the one that you need by using the trade chat. Keep in mind, when you are trading for a requiem mod you want, make sure it is fully filled i.e. it has 3 red dots on it which means it can be used thrice. Requiem mods also sell for 10 platinum each so if you have platinum to spare you can buy them from someone. After you have the requisite mods, it is time to get serious and go after the Lich. Keep in mind that you want your lich to be level 5 before you vanquish it and you get your lich to level 5 by using incorrect requiem mod combination in the parazon.
This is how it works, if you mercy kill the lich once with Requiem mods on your parazon you’ll get one of these two results either the first mod will turn whitish that means the mod was slotted in the correct slot or it will stay red but a red slash will appear on it meaning the mod was in the wrong slot. So, if you get it wrong the Lich will rank up to Rank 2 and escape to Mars and occupy the nodes there. For this trophy you have to ensure that you get the mod order wrong till the Lich reaches Rank 5 which will cause the Lich to escape to Kuva Fortress and it will occupy the nodes there. This will level up the enemies to Level 90-110 which is quite high for normal players and the lich cannot rank up higher than Rank 5. By now, you should also be aware of the correct mod order.
Note: Successfully completing all available Kuva Lich mission nodes by just ignoring it will automatically rank the Kuva Lich up and cause them to take over the nodes in another planet.
These requiem mods only lose their rank when you finally vanquish the lich, they will drop to Rank 2 i.e. 2 red dots from rank 3, and not when you mercy kill it to figure out the mod order so don’t worry and get to stabbing. Once you know the correct order, configure your parazon accordingly and this time mercy kills the lich, you’ll have to do it thrice for each health bar and that is why you need 3 mods. After you have stabbed it thrice the Lich will escape to Saturn Proxima thereby requiring you to have a railjack and intrinsic level 5 in any of the 5 classes. Thankfully, all of the above mentioned stuff can be done in public lobbies so make sure you are playing with a full squad and recruit chat is your friend. Now, hop onto a railjack, yours if it is decent enough to take a beating or use the public lobby to complete this final step before getting the trophy. Defeat the enemies present outside the ship in which the Lich is and then enter the ship. The Liches of all players in the squad with you will spawn, so keep track of which one is yours. Defeat it one last time, perform a mercy kill on it and it will give you the option to either capture it or vanquish it. For this trophy you want to vanquish it and once you do it you will pop the trophy and the Lich’s weapon will be sent to your foundry where it can be claimed by you. Phew!
Update 30
Enter the Dry Dock |
You can visit a dry dock in your clan dojo or you can visit specific relays depending on the platform you play warframe on, for example you have dry docks on Strata and Kuiper on PS4/5. You just need to visit it for this trophy.
Assemble a Railjack |
Completing the Rising Tide quest grants you this trophy as in that quest you are tasked with assembling a railjack by doing certain missions and scavenging parts to build your own. After each part is recovered you will be given the option to build that part and this will require some materials so make sure you have enough on hand or you can grind the resources needed. After the part is build you’ll progress to a new part and so on till your railjack is complete.
Update 31
Pilot a hijacked enemy crewship during a Railjack mission |
Crewships are special vehicles that appear in railjack missions and they can be boarded by a player. To do that, while you are in a railjack mission hop out of your railjack once you see a crewship and travel towards it on your archwing. Once you are close enough you’ll be prompted to board it, enter the ship and start moving to the other end of the ship. Ignore the console and tower at the center and keep moving till you reach the pilot’s console. You’ll have to hack it and once you do, you will be able to fly the crewship, do it and the trophy is yours.
Shoot down 100 enemies while in a Railjack |
Not much to it, just destroy 100 enemies and the Railjack doesn’t have to be yours so, you can do this in a public lobby as well. You’ll get this trophy naturally since you have to gain as much affinity as you can get to reach Rank 5 in any intrinsic class to Vanquish a Kuva Lich.
Update 32
Collect 50 Ganglion from Haptic Frond. |
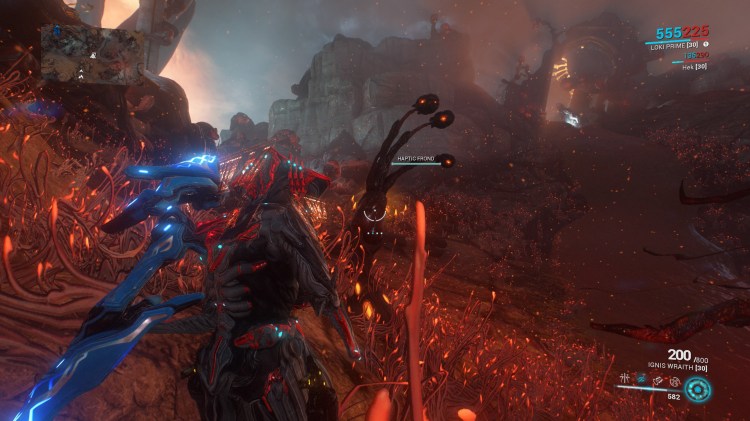
This is a Haptic Frond, found in the Cambion Drift, destroy it and it will drop Ganglion. Collect 50 and you will pop the trophy,
Kill 5 Juggernauts in Cambion Drift. |
Juggernauts are reinforced infested and can take quite a bit of damage. You can encounter juggernauts in Cambion drift free roam or while doing bounties. Kill 5 of them to pop the trophy
Burn 100 Infested pods. |
Infested pods are these orangish-red sacks which house an infested creature. For this trophy use a weapon like Ignis/Ignis wraith to burn them. Make sure that you are fast enough to do it before the infested burst out from them because once the infested have spawned from these pods, they disappear.
Ride 20 Velocipods. |
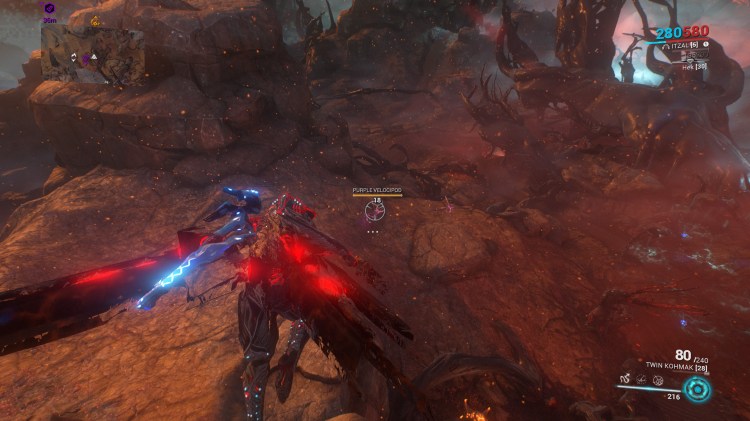
You can encounter Velocipods while roaming around in the Cambion Drift and they kind of look like huge dragon flies. Just walk up to them and press square to ride them and they are not as skittish as some other animals in Warframe so don’t worry about using a stealthy frame. I have included the location where I found them as well but be aware they spawn at other locations as well and you might need to roam around for a bit to encounter them. They are of three types: Green, Purple and White. You also need purple velocipod tags for building the Helminth Segment.
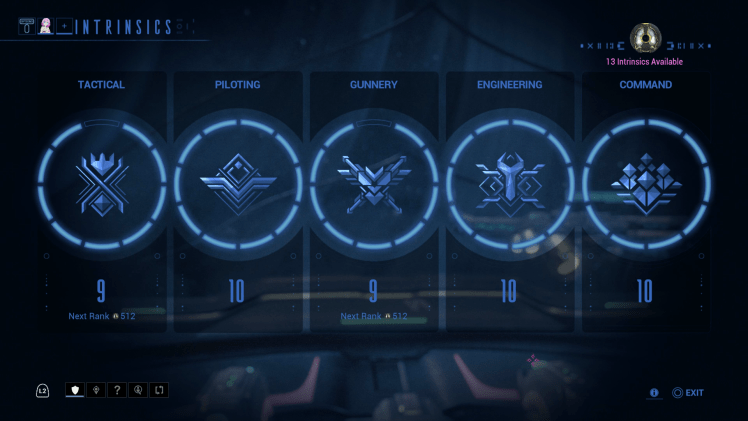
Attain Command rank 10. |
(Credits to Snowy Senpai for this photo)
To attain this you’ll need a cumulative total of 1023 intrinsic points. You can get intrinsic points by gaining affinity during railjack missions and performing tasks like putting out fires in the Railjack, repairing a hull breach, killing boarding parties etc. The amount of intrinsics earned are affected by Affinity boosters and the relevant Smeeta Kavat’s charm buff so plan accordingly to make this easier.
Craft a Sisters of Parvos Tenet Weapon. |
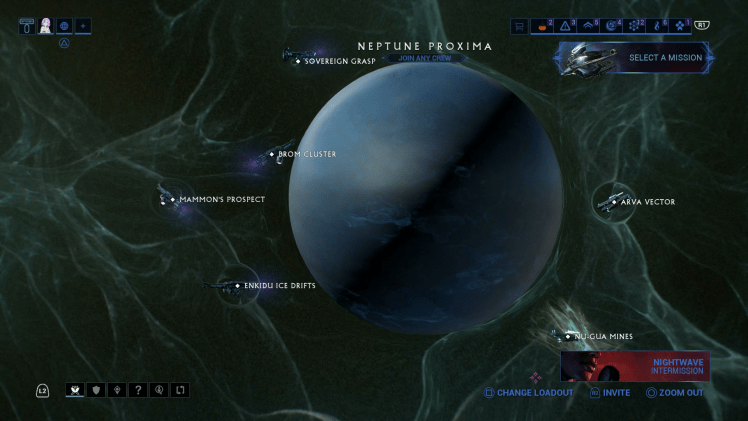
The trophy description might confuse some people but what the trophy essentially asks you to get is a Sister of Parvos weapon and you can get that by Vanquishing a Sister. You need to complete The War Within Quest and Call of the Tempestarii before working towards this trophy. After you have vanquished a Sister, her weapon will be delivered to your foundry, hence the crafting mention, claim it from there and get the trophy. Vanquishing and getting a Sister weapon, for the most part, is the same as for the Kuva Liches but there are differences in the way that you acquire a sister candidate and the speed at which you attain murmurs as well as the planets occupied. I’ll briefly explain as to how you can get a Sister candidate: First, you need a Zenith Granum crown (dropped by killing The treasurer in LV 31+ corpus missions, also you need to complete Deadlock Protocol before these Treasurers start appearing) and then use that crown in Corpus missions at a giant Golden Hand to enter into the Nightmare Granum void. You can only use Zenith Granum crown to enter the Nightmare Granum void. After you have entered it, you need to kill 25 specters to reach Rank 1 in it. Keep in mind that for every extra member in the squad the requirement will go up by 25 kills, so for 2 extra members you’ll need 75 kills for Rank 1. After exiting the Nightmare granum void with Rank 1, a sister candidate will spawn soon after, kill it and it will show a weapon above its head and the same weapon will be wielded by the Sister. If you like the weapon, mercy kill the candidate and a Sister of Parvos will rise up, keep that in mind if you take too much time to decide, the candidate will disappear. Once you are back in the orbiter you screen will turn bluish and you’ll get a message from your Sister. From this point on, the procedure is the same as getting a Kuva lich i.e. murmur farming in order to figure out your parazon mods. Here, you will be killing the Sister’s hounds instead of Thralls in the case of Liches and the planets will be different as well (corpus controlled planets) as you sister will first take over Venus. After you have finally killed you Sister by using the right combination of requiem mods, she will flee to Neptune Proxima (Saturn Proxima for Liches). For more information about Parazon mods and hunting liches/sisters refer to the ![]() That Which Does Not Kill Us trophy.
That Which Does Not Kill Us trophy.
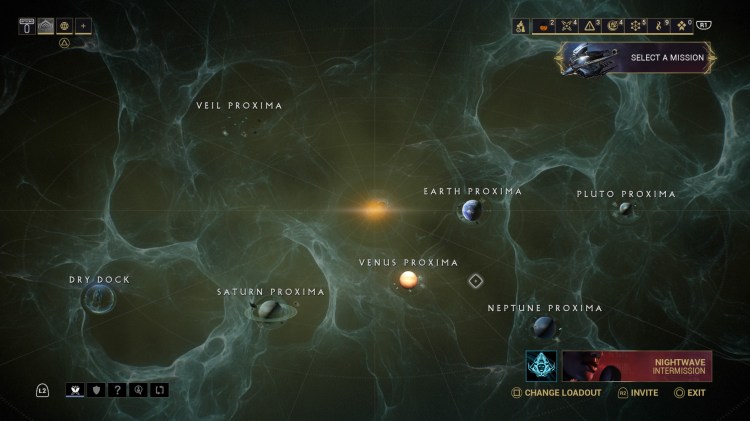
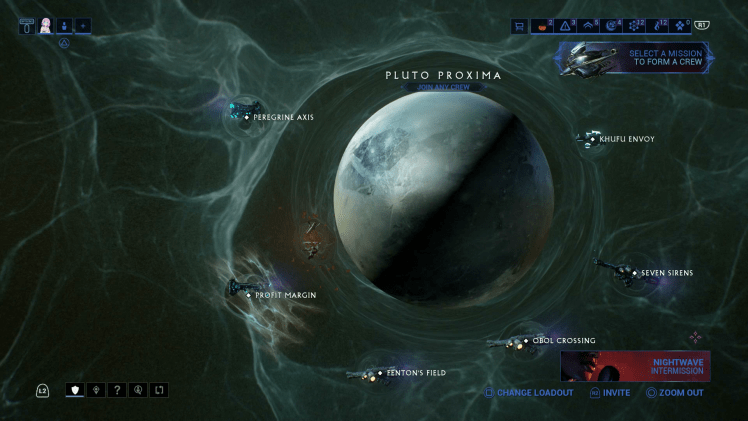
Complete all Corpus Proxima Railjack nodes. |
(Credits to Snowy Senpai for the photos)
This requires you to complete all the Corpus controlled railjack nodes i.e. all the nodes on Venus proxima, Neptune proxima, Pluto proxima and some nodes on Veil Proxima. This totals to 24 nodes and you need 25 nodes for the trophy, the last node will be available when you go for Sister confrontation in Neptune Proxima, finish that and voila you have 25/25 nodes done giving you the trophy.
That’s it for the guide, I hope you found it useful.
Tips and Strategies:
Here are some tips to increase your knowledge of this game. *Use this section a bit later into the game as reading this early can get a bit overwhelming since you won’t be aware of the terms/details mentioned here.
- Once, you start getting mods ensure that you can get status effects on your weapons since they are a blessing. Viral is quite important and you can get it if you combine a cold damage mod with a toxin damage mod on your weapon.
- Always open relics in a group of 4 to maximize your efficiency so that if the item you get from your relic isn’t anything special, you can choose someone else’s. You can also join in parties via the recruit chat if you are looking for a specific prime part. Unless, you want to complete a specific set always pick the item with the highest rarity as you can sell it for platinum if you don’t need it.
- To farm relics, for Lith relics: Hepit in the Void, for Meso: Io on Jupiter, Neo: Ukko in the Void and you can also get meso relics from here as there is a 50% chance of both, Axi – Apollo disruption mission on Lua.
- You get a daily login credit bonus for your first mission of the day which can double the amount of credits you get and it is applicable for most missions. So, make sure you choose your first mission carefully.
- Sorties – These are available everyday and is a set of three missions all of which you have to complete to get a reward that can be a riven mod, ayatan anasa sculpture, exilus adapter etc. You’ll have access to sorties after completing the War Within quest. You’ll get the reward only once. They change everyday and take place on different mission nodes so it is recommended that you complete all the mission nodes as well, since some of the rewards from sorties are quite useful.
- Ayatan stars and sculptures – Ayatan stars are of two types, the much more common ayatan cyan star and the rare ayatan amber stars. They are used to fill up ayatan sculptures, which are these small sculptures which come alive when fully slotted with ayatan stars. These sculptures can be sold for Endo in Maroo’s Bazaar. You’ll encounter her in the Stolen Dreams quest. Visit her and exchange these sculptures for Endo, she also offers a weekly treasure hunt in which you are tasked to reach a treasure room after navigating traps and obstacles where an Ayatan sculpture is waiting for you. Grab it and extract. Weekly Treasure Hunt is only available after completing the Stolen Dreams quest. This treasure hunt will reward you only once.
- You can get mods called corrupted mods by opening vaults found on the Planet deimos. These vaults are hidden in missions and to open them you will require keys. There are four types of keys, Hobbled, Extinguished, Bleeding and Decaying dragon keys. You can get the blueprint of these keys from the clan dojo.
- It is recommended to join a Syndicate to take advantage of the various syndicate specific mods for your warframe and weapons as well as access to syndicate exclusive weapons. You can even sell mods and weapons parts for platinum. Keep in mind that these Syndicates bicker with each other so do a bit of research before joining a syndicate.
- I will recommend some weapons which are considered “strong” in warframe but I would advise you to try and find out your own favourites. Also, most of these are viable for mid-game (Except the Kuva weapons, Ignis wraith) and by the time you reach higher mastery and are close to completing the Star Chart you will have access to prime versions of weapons. Primary – Ignis (MR 5, location chem lab in clan dojo), Ignis wraith (MR 9, ask nicely in trade chat and someone will give it to you for free, don’t pay plat for it), Kuva Bramma (Get it by killing your Lich if he has one and MR requirement is bypassed if you get it by killing your lich), Kuva Zarr ( Same procedure as Kuva Bramma), Acceltra (MR 8, killing demolishers on the disruption mission on Ur, Uranus); Secondary – Kuva Nukor (same process to acquire it as other Lich weapons), Atomos (MR 5, buy blueprint from the market), Akarius (MR 8, drops from the same enemies as Acceltra in the same mission); Melee – Broken War (Reward for completing the Second Dream quest), Nikana (MR 4, get bp from the tenno lab in the dojo), Skiajati (Reward during The Sacrifice quest), Xoris (Obtained during Deadlock Protocol quest). Again, there are plethora of weapons in warframe, try them out and then use the ones you find better for you.
Good luck Tenno and may you find your journey eventful – Fellow Tenno

2 thoughts on “Warframe (PS5) Trophy Guide”