
Trophy Roadmap
Difficulty: 4/10 base game; closer to 5/10 with DLC
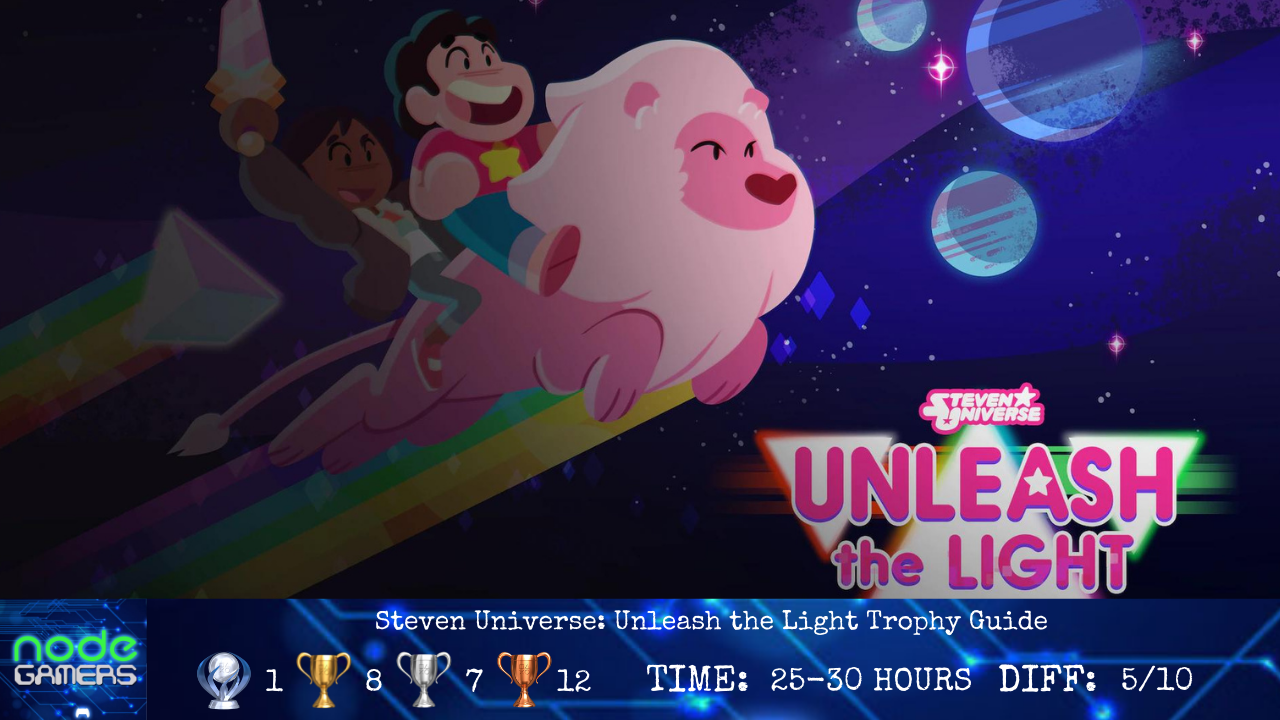
Estimated time to Platinum: 25 – 30 hours
Trophies: 22 ![]() 1 /
1 / ![]() 8 /
8 / ![]() 6 /
6 / ![]() 7
7
Free DLC: ![]() 5
5
Missable trophies: None, but read ![]() Risky Bismuth for information on how the game’s two mutually-exclusive trophies work.
Risky Bismuth for information on how the game’s two mutually-exclusive trophies work.
Glitched trophies: None
Difficulty related: No ability to select difficulty, but there is a difficulty-related trophy in the DLC (see ![]() Space Train to the Cosmos)
Space Train to the Cosmos)
Playthrough: 1
Introduction
Welcome to the Steven Universe: Unleash the Light trophy guide!
Steven Universe: Unleash the Light is the third in Grumpyface Studios’ trilogy of Steven Universe RPG games, ported to PS4 in 2021. The only other game from the trilogy on consoles is Save the Light, which was ported in 2017.
As it is the direct sequel to Save the Light, knowledge of that game (and the show in general) is helpful, but not totally necessary to enjoy the game.
Roadmap
Step 1: Play the game until the final boss fight, 100%ing each level as you go
While 100%ing each level before moving on to the next isn’t strictly necessary, it will ultimately save you time later, as the maps will be fresh in your head. You can work on the Palace of Light during this step if you want, but to actually finish it, you’ll need to 100% the four worlds in order to get enough keys to progress through the entire palace.
At the boss fight at the end of world 2, make sure you go for ![]() Risky Bismuth, to save a lot of time levelling her up later.
Risky Bismuth, to save a lot of time levelling her up later.
You’ll be earning these trophies:
![]() Steven’s RPG
Steven’s RPG
![]() Attack the Light
Attack the Light
![]() It’s A Secret to Everybody
It’s A Secret to Everybody
![]() Risky Bismuth
Risky Bismuth
![]() Rock The Vote
Rock The Vote
![]() Be There Or Be Square
Be There Or Be Square
![]() Era 3 Winning Spree
Era 3 Winning Spree
Step 2: Finish the Palace of Light (final boss), 100%ing it along the way
The Palace of light is a giant dungeon that gets progressively harder the deeper into it you go. Thankfully there are several portals in it, so if you decide to leave it, you don’t have to start from the beginning. It’s pretty easy to get turned around while navigating it; check ![]() Keys are the Key, You See for a map.
Keys are the Key, You See for a map.
During this step you’ll earn these trophies:
![]() Keys are the Key, You See
Keys are the Key, You See
![]() Across The Universe
Across The Universe
![]() Attacked, Saved, Unleashed
Attacked, Saved, Unleashed
Step 3: Miscellaneous trophies
If you didn’t unlock these during your base game playthrough, now is the time to do it before you get down to the DLC grind. This is also where you can go back to unlock the other mutually-exclusive trophy from the world 2 boss fight.
During this step you’ll earn the following trophies:
![]() Pearl-fect
Pearl-fect
![]() Captain Universe
Captain Universe
![]() It’s A Wash
It’s A Wash
![]() Giant Women
Giant Women
![]() The Box That Rocks
The Box That Rocks
![]() Cookie Cat Recall
Cookie Cat Recall
![]() Shorty Squad
Shorty Squad
![]() Green Thumb
Green Thumb
![]() Clod Goals
Clod Goals
Step 4: DLC Trophies
The game’s DLC given for free via a gameplay patch. Unfortunately, you cannot get the platinum without playing it, because you will need to 100% the DLC dungeon for ![]() Perfect Porkchop. While playing through the DLC dungeons, you should get close to fully levelling up your characters, if you don’t outright do so. See each DLC trophy for more information.
Perfect Porkchop. While playing through the DLC dungeons, you should get close to fully levelling up your characters, if you don’t outright do so. See each DLC trophy for more information.
During this step you’ll earn the following trophies:
![]() Over 9000
Over 9000
![]() Perfect Porkchop
Perfect Porkchop
(![]() Unleash the Light will unlock once you’ve unlocked these two trophies; congratulations!)
Unleash the Light will unlock once you’ve unlocked these two trophies; congratulations!)
![]() The Cat-valry’s Here
The Cat-valry’s Here
![]() Prismatic Procuration
Prismatic Procuration
![]() Little Homeschool
Little Homeschool
![]() Crying Breakfast Friend
Crying Breakfast Friend
![]() Space Train to the Cosmos
Space Train to the Cosmos
Tips and Strategies
Protect Steven! He’s the only one who can access the backpack – which has important things like revival items. If Steven does fall, you can revive him by using George’s team ability (the white creature from the  bar), as that seems to be the only non-revival healing ability that actually works on fallen allies. Steven does have an upgrade that allows the backpack to be used if Steven is out of commission, but it’s pretty far down on the upgrade tree.
Abuse the shop stages to build your inventory! Once you’ve picked up the unique items from them (i.e. the badges/costume schematics), they will always offer up the same items. Some particularly useful ones, with the price:
– World 1: 3x together breakfast (150)
– World 2: 3x super star fruit (260) / 3x big donut (150)
– World 3 (next to 3-9): Rose’s tears (130)
Make sure you’re “disenchanting” the charms your characters have outgrown. This will not only clean up your inventory, but will break down charms into credits and sometimes even chroma. It’s amazing how many credits you can raise in one round of going through and disenchanting everything that isn’t actively equipped.
Have Amethyst in your party during the stages in world 4 (Hessonite’s Warship) where there are switch puzzles to get through doors. Her fire bottle attack will render most of the switch puzzles trivial because you don’t have to worry about it affecting any of the other switches..
If you enjoy my work, please consider donating to my Ko-fi.
If you liked this guide, you’ll find more on our site.
You can also chat to our writers and friends by joining us on Discord with this link – Discord Invite
Trophy Guide
 Collect all other trophies |
Isn’t it remarkable, Steven? This world is full of so many possibilities.
 Learn the ropes! |
Story-related and cannot be missed.
This is the first trophy you will unlock, when you finish the game’s tutorial (which ends when you learn about how Lapis controls in combat).
 Defeat 100 Light Constructs |
This will come when going for other trophies on the list – and probably fairly early on in your playthrough. Don’t even worry about it.
Discover a secret room |
You will earn this en route to unlocking ![]() Perfect Porkchop, as you will need to discover all secret rooms as a condition for that trophy, but the earliest you can unlock this trophy is in Alien Moon Stage 1-2 – the room before the exit teleporter has an area you can go down into.
Perfect Porkchop, as you will need to discover all secret rooms as a condition for that trophy, but the earliest you can unlock this trophy is in Alien Moon Stage 1-2 – the room before the exit teleporter has an area you can go down into.
Perform 10 Perfects in a row (without missing any perfect attacks or blocks) |
This really comes down to having a character you’re comfortable with, and going against enemies with attacks you’re comfortable blocking. For me, that was Garnet, but I also think you could have an easy time with Lapis, as her wave attack will allow you as much time as you want to hit the perfect marker, whereas with Garnet, you only have one shot per round. That having been said, I recommend only using Lapis’ attack on a single enemy at a time, as there will be a perfect marker for each enemy in the wave’s path, and you’d therefore have to hit both in a single go.
If you’re having trouble, go to Alien Moon 1-3. Go left 3 screens, down 1 screen, then left 1 screen. (Alien Moon 1-4, up 2 screens and right 1 screen also works). Kill the light blue boomerang enemy, then keep skipping your attack phase and just block the attacks the other three enemies level against you. These star-looking enemies only have one type of attack to block, which will make the timing much easier on you. I can confirm you can take the time to heal your characters with Steven’s ability while still in the combo (it has no star meter to worry about).
Hit at least 6 enemies with one Shield Throw |
Steven’s will unlock his Shield Throw ability at level 2. By using it, you can choose two targets to hit – and the shield will also hit anything in its way to and from those targets. You will need a group of at least six enemies for this trophy.
On Alien Moon 1-6, if you go right 2 screens and down 2 screens, you will encounter six bomb enemies. If you select the top left and bottom left enemies (aka: the top and bottom enemies of the back row), then your attack should hit all six, earning you this trophy. There’s a bit of RNG involved in this, so if it doesn’t work the first time, try again.
Defeat three enemies at once with Lapis’ Tidal Wave |
Lapis starts with her Tidal Wave attack already unlocked. It damages enemies in a straight row, so you will want to find three of the same enemy in a row and use her attack to take them out. Unless you’re really good at hitting the perfect attack bars in her attack, do not try for them while going for this trophy, as you’ll only deal extra damage to the enemies whose perfect bars you hit, and for this trophy you’ll want to do consistent damage across all enemies.
There’s a decent place to unlock this in Alien Moon 1-8. From the start, go left, then down, then right. You will reach four small bomb enemies and one large one. Use Garnet to take down most of the big bomb’s health, then either successfully use Lapis’ focus ability, or use Steven’s Shield Throw to take down some health of the bombs in front of the big guy (depending on your levels, this may not be necessary). Then put Lapis in the back row and unleash her Tidal Wave attack at the row of three.
Alternately, in Demantoid’s World 2-8, if you take the left elevator up to the second floor and go down 2 screens, you will encounter a circle of small bomb enemies. Place Lapis in the top row and you should be able to hit all three of the top ones.
Perform any fusion |
The earliest fusion you can get is Sunstone, unlocked when Garnet reaches level 3 (Steven/Garnet fusion), but any fusion will work for this trophy.
To perform a fusion, you first need to fill up the teamwork bar at the bottom of the screen – this is the bar that fills whenever you perform any sort of battle action. Once it’s full, press and select your chosen fusion.
The white creature holding the heart with the plus on it (George) isn’t a fusion, and does not count towards this trophy.
Prevent the Prism Containment Chest from being stolen |
This is technically a story-related trophy, but it is mutually exclusive to ![]() Risky Bismuth. DO NOT unlock this one during your story playthrough; unlock this on a revisit to the stage.
Risky Bismuth. DO NOT unlock this one during your story playthrough; unlock this on a revisit to the stage.
At the end of the Demantoid’s World boss fight, you’ll have a cutscene and then you’ll face a choice: help Bismuth, or retrieve the box stolen from Bismuth. For this trophy, you will want to retrieve the box.
If you choose this option, you will not be able to use Bismuth again for quite some time. I highly recommend unlocking ![]() Risky Bismuth during your story playthrough, because not only is she a useful tank to have in battle, but you’re going to have to level her up for
Risky Bismuth during your story playthrough, because not only is she a useful tank to have in battle, but you’re going to have to level her up for ![]() Over 9000.
Over 9000.
Once you’ve finished the main game (Attacked, Saved, Unleashed), you can re-enter the boss fight on Demantoid World (world 2), and you’ll be able to fight the boss again. Or you can back up your save prior to fighting the boss the first time, unlocking this trophy, then reloading the save and continuing with a Bismuth-saved game. However you do it, it is in your interest to continue the story on a save file that has the results of ![]() Risky Bismuth rather than the results of this trophy.
Risky Bismuth rather than the results of this trophy.
Protect your teammate from Demantoid |
This is technically a story-related trophy, but it is mutually exclusive to ![]() The Box That Rocks. Make this the trophy you unlock during your playthrough, to save levelling time on Bismuth for
The Box That Rocks. Make this the trophy you unlock during your playthrough, to save levelling time on Bismuth for ![]() Over 9000.
Over 9000.
At the end of the Demantoid’s World boss fight, you’ll have a cutscene and then you’ll face a choice: help Bismuth, or retrieve the box stolen from Bismuth. For this trophy, you will want to attack the prism that is damaging Bismuth.
I recommend making this the trophy that you continue the game on, because it means Bismuth will stay in your party instead of being put out of commission – plus you’ll get a helpful badge. So unlock ![]() The Box That Rocks and reload your pre-boss save before going for this trophy.
The Box That Rocks and reload your pre-boss save before going for this trophy.
Establish Democracy in a formerly-conquered Gem colony. It’s always important to vote! |
Story-related and cannot be missed.
At the end of the Demantoid’s World boss fight, you’ll have a cutscene and then you’ll face a choice: help Bismuth, or retrieve the box stolen from Bismuth. Whichever you choose, you will have a follow-up cutscene and this trophy will unlock.
The Demantoid World boss fight takes place on a randomized grid. The boss will summon one-hit enemies of different colors, and they have different effects. These enemies will change at the end of each of your turns, so the fight is a balance between dealing damage to the boss and taking out the one-hit enemies so you don’t take too much damage.
- Green – heals the boss. Doesn’t heal much; just ignore them.
- Blue – you will be required to take these guys out if you’re trying to damage the boss that round, as they provide shields to the boss.
- Red – Make these guys a priority to kill. They suicide rush a party member, dealing a large amount of damage before putting burning status effect on them. They’ll do the same thing if you don’t kill them; it’ll just hurt more.
- Purple – attacks your party
Bismuth is an excellent character to be using, if you haven’t been until now, because she has an AOE attack that can take out multiples of the enemies without the need for them to be in a line. Additionally, you can stack five of Amethyst’s fire breath burning effects on the boss (or use an item that gives burning to regular attacks, and stack them that way), so that if you go through a round where you don’t directly damage the boss, you can still deal 20-30 points of damage at the end of each turn.
Complete any Chapter 3 battle stage without using any items. |
This is probably easiest done in Pyrope’s World 3-1. From the entrance pad, go down 2 screens to an easy fight with only two enemies.
This isn’t actually a difficult trophy to unlock, as you can still use Steven to heal party members. Just don’t use anything that comes from the cheeseburger backpack and you’ll unlock the trophy at the end of the battle. If you’re having trouble, come back to this fight when you’re more levelled up (I unlocked this with no problems when my party was at level 15-16).
Complete 10 battles with both Amethyst and Peridot in your party |
You will start the game with Amethyst as a playable character, but you won’t have access to Peridot until midway through the third world – specifically during the ![]() Be There Or Be Square subquest. As the trophy states, complete 10 battles with both of them in your party – they must be alive at the end of each battle. Both have pretty weak defence and HP stats, so I recommend going back to the easy early levels to knock this one out.
Be There Or Be Square subquest. As the trophy states, complete 10 battles with both of them in your party – they must be alive at the end of each battle. Both have pretty weak defence and HP stats, so I recommend going back to the easy early levels to knock this one out.
Use Peridot’s teamwork ability to summon a loyal friend |
Peridot will join your party during the ![]() Be There Or Be Square subquest. At some point she will unlock the Call Pumpkin team ability – I recruited her when she was at level 14 and she already had the ability, so I’m not entirely sure when it unlocks.
Be There Or Be Square subquest. At some point she will unlock the Call Pumpkin team ability – I recruited her when she was at level 14 and she already had the ability, so I’m not entirely sure when it unlocks.
Once you have a full team ability bar, select the pumpkin icon and you’ll unlock this trophy (the pumpkin will give you extra star points for every round that it’s out)
 Investigate the mysterious radio signal |
The mysterious radio signal is located in Pyrope’s World, 3-4. From the entrance, go right for a cutscene, and the signal will move. Go to the Alien Moon boss stage next, and go to the end of the stage. You will finally be able to recruit Peridot into your team, before being whisked off to the newly-created 1-10. The trophy will unlock after a cutscene at the end of the stage.
The radio signal quest will eat into your completion percentage; hence, it is required for ![]() Perfect Porkchop.
Perfect Porkchop.
Complete a secret Chapter |
Story-related and cannot be missed.
You will unlock this trophy after defeating the boss of Hessonite’s Warship (world 4).
This boss fight will involve you killing waves of enemies while Peridot hacks into the ship’s computer . Bring along Amethyst (put her in the back row, as her defense stats aren’t great); the enemies tend to group together, and her whip ability will be useful in taking several out at once – especially if they have burn status already on them. If you equip her with the Lucky Star badge (which you should have obtained from a chest after the world 3 boss fight) and bring along several super star fruits (stock up at the shop stage in world 2), then more often than not you can take out the entire wave without them ever counterattacking.
Hopefully you’ve developed a good perfect blocking reflex, as the waves of enemies will often send energy balls at you at the beginning of each round. Whenever you block them, you’ll instigate a rally, and if you win it, the energy ball will take off quite a bit of health from the enemy.
Defeat three enemies at once with Peridot’s Self Destruct Robonoids ability |
This one can be frustrating, because if you don’t get everything set up in a single turn, there’s a good chance the robonoids will just kill your targets with their regular shots. I went into this with Steven’s extra pockets perk equipped (gained by forging one of his alternate costumes), I also had Peridot’s improved gravity connectors upgrade from her tactics upgrade tree – you will only need one of these, as they’re both in service of the same purpose. I also had a regular star fruit inventory item. Peridot was at level 14 – try not to get much higher a level, because you’ll run the risk of the robonoids just outright killing the enemies with the shot they take when you put them down.
Make sure Peridot is in the back row, then take her to Demantoid’s World 2-8. Take the left elevator to the second floor, then go down one screen. Have Peridot put down a robonoid. Move her to the front position and put down another one. Move her to the top position (you can do this without using an item, since you’ve unlocked that perk I mentioned above; or, if you have Steven’s extra pockets perk, use a gamepad item) and place another robonoid. At this point, you should have had her put down a robonoid at the top, front and back positions.
Use a star fruit item so you have at least four star points, then have Peridot use the self destruct ability. Target the middle enemy in the back row. This should take out three or four of the enemies. There’s a bit of RNG involved in this, so if it doesn’t work the first time, try again.
This would probably also work with the group of enemies on Alien Moon 1-6, where you unlocked Captain Universe . In that instance, I would make a row of robonoids – top position, front or back position, and bottom position, then target the large bomb enemy when you activate the destruction ability.
Peridot also has a perk that unlocks when you craft one of her alternate outfits, called Gem Technician, which will automatically place a robonoid after her first formation swap. I did this trophy without using it, but that’s also an option if you’re still having trouble with timing it all in a single round.
Unlock every Light Barrier in the Palace of Light |
You will gain rainbow keys by either finding them in stages or by solving light beam puzzles. However you obtain them, having them is a requirement for Perfect Porkchop . There are a few gold keys to help progress further through the dungeon – you will obtain these via story progression, and these keys also count towards the trophy.
There is a light beam puzzle that spans the entire left/west side of the palace. To save yourself a headache and backtracking, take care of the puzzle steps whenever you come across them. It’s not a difficult puzzle; it’s fairly obvious where you need to aim the light beam. Generally-speaking, you want to keep the beam going up/north. Near the Stairway entrance point, the light puzzle will end up going left/west to the final part, which is near the Balcony entrance point.
Reddit user linlaowee (with assistance from cryptoxima) has put together a map of the Palace of Light, complete with treasure and ore locations, to help you navigate. Note that this is the same map twice, with the right map showing the lower levels that are blocked by the upper levels.

Unlock and visit every stage |
Story-related and cannot be missed.
You will unlock this trophy after entering the rainbow door that leads to the final boss fight in the Palace of Light (see ![]() Attacked, Saved, Unleashed for more information about that).
Attacked, Saved, Unleashed for more information about that).
Liberate the other Prisms |
Story-related and cannot be missed.
The game’s final boss fight takes place at the top of the Palace of Light; there are two phases.
The first phase Is surprisingly straightforward, when compared to the game’s previous fights; the boss just has a lot of HP. Together breakfast, bottles of Rose’s tears, and super star fruits are your friend.
Just whittle away at her health while keeping your health up. The boss has three attacks:
Single attack – the boss will hit one character, hard. Heal as soon as possible – big donuts or ube roll cakes are helpful to have if you don’t have the star points to spend on a few rounds of healing.
Full-party attack – bring some together breakfast items with you to recover from it quickly, and hopefully you’ve become good at perfect blocks during your time playing.
Splitting into four versions of herself – only one will take damage, while the other three, if hit, will kill the attacking character before disappearing. Her placement is random, so watch for the one that glows white longer than the rest when they’re breaking up; that’s the one you want to target (her fan also stays white). When she’s broken up like this, do not attack with Steven, just in case you get it wrong and need to quickly revive your character.
After a few cutscenes, you’ll be teleported to the second phase of the boss fight. You will be forced to include Hessonite in your party for this part.
Attack the triangle in the middle – after a few hits, the shields on the two bosses will lower. You will have one round to deal as much damage to them as possible. If you allocate your star points well, you can take down one if not both bosses in a single turn – using Garnet (or whomever your main fighter has been throughout the game), take one turn to whittle the triangle down to the last hit, end the turn, start the next turn by taking down the triangle, popping a super star fruit when your star points get low.
Once the fight is over, you will have a dialogue choice – your response probably doesn’t matter, but I chose to call out to George. The trophy will unlock during the ending cutscenes.
Fully Level Up all of the Crystal Gems |
Basically, you need to get everyone to the maximum level, which is 35.
Party members will still level up when they’re not actively in your party, but they will level up more slowly. This is where the level up items come into play. With the level up items, you can immediately level up any character you choose. Obviously, you should save them for higher levels, as those will require more XP – I recommend not using them until a character has reached level 30. Don’t use them on Steven at all, as you are never be able to remove him from your party, so it would just be a waste.
It is important to keep in mind that that the way to level up items work is that they’ll just bump the character up by however much XP they need to hit the next level! So don’t use it when your character is halfway through a level. Use it when they’ve just levelled up, for maximum effect.
I finished the base game with all worlds 100%ed, and wound up with 22 level up idols in my inventory. I was not able to find a shop that consistently spawned level up idols; please let me know if there is one. I also never came across level up items in the Black Hole dungeon shops.
Complete the game to 100% |
NOTE: with the addition of the free DLC, those stages count towards this trophy as well – see ![]() Space Train to the Cosmos for more information on obtaining 100% in the Black Hole stages.
Space Train to the Cosmos for more information on obtaining 100% in the Black Hole stages.
On the map, each stage will have a count of what exactly is needed to 100% the stage.
Chests – obvious. Treasure chests that need to be opened
Rainbow key – these are sometimes in chests or lying around in secret rooms, and sometimes you’ll have to solve light beam puzzles to get to them. These are the keys for ![]() Keys are the Key, You See.
Keys are the Key, You See.
Question marks – this is kind of a catch-all thing. It could be secret rooms, or quest items, or non-rainbow keys needed to help you progress through the stage. It could also be non-consumable items you get from treasure chests, like charms, badges, etc. If you’ve checked off all of the other icons, you’ll likely have fulfilled this one as well, so don’t worry too much about it.
Shop icon – sometimes this is the brown idol statue, and sometimes it looks like a shopping cart. While most stages will have the shop idol that you can visit to get healing items, etc, not all stages require you to buy something from it. Stages that have the shop icon on the map will have a shop idol with a unique item that you need to buy – usually a badge or a costume schematic, but sometimes it’s chroma. Whatever the unique item is, that’s the one you want to buy to tick off the completion for that stage.
Nearly all stages can be 100%ed your first time through, and I suggest you do so while the maps are still fresh in your mind. The exceptions are the village stages, as those give you subquests that you need to carry out in other stages.
DLC Trophy Pack 1
Defeat two or more enemies with a single use of Connie & Lion’s Lion Charge ability |
Connie and Lion are located in the Rainbow Palace. You will need a total of six rainbow keys to access the room where you can recruit them. They should come with the Lion Charge ability already unlocked by the time you recruit them, but just in case: they were at level 7 when I recruited them, and they had the ability, so if you’ve recruited them at a lower level, you may need to level them up first.
This is pretty easily done in the same area where you did ![]() It’s A Wash (Alien Moon 1-8) or where you did
It’s A Wash (Alien Moon 1-8) or where you did ![]() Clod Goals (Demantoid’s World 2-8).
Clod Goals (Demantoid’s World 2-8).
Collect a Rainbow Charm |
You may have noticed while playing that charms come in different colored cubes, which dictate how common they are. For the vast majority of the game, you will only see white, blue, or purple cubes – denoting common, uncommon, and rare. You won’t encounter yellow (legendary) until you start playing the Black Hole dungeon on hard difficulty. Rainbow charms are also in the Black Hole dungeon, on diamond difficulty.
You may randomly receive one from a treasure chest, or be able to buy one from a shop. But you are guaranteed to get one when you beat the diamond difficulty boss, so this trophy effectively goes hand in hand with ![]() Space Train to the Cosmos.
Space Train to the Cosmos.
Receive an “A++” Grade in the Black Hole Chapter |
This may be the most difficult trophy in the game; thankfully (unless you’re a completionist), it’s not required for the platinum trophy.
At the end of each run in the Black Hole dungeon, you are given a letter grade. You are scored on completion, perfects, and teammates defeated.
To earn an A++ grade, you need:
- Get 100% completion in all stages (just like in the base game) – this DOES include opening the cosmic chest!
- Have died no more than a single time
- A high percentage of your combat strikes and blocks need to be perfect. Thankfully it doesn’t need to be 100% perfects, but it does need to be at least 85%
It’s that last factor that leads to my belief that this is a more difficult trophy than ![]() Crying Breakfast Friend, which I consider the second most difficult trophy on the list. .
Crying Breakfast Friend, which I consider the second most difficult trophy on the list. .
Do this on Normal difficulty, so you can make use of both your entire inventory and the perfect block and attack stars. Abuse the fact that you can back out of and reload the same Black Hole dungeon, and make save backups when you’re absolutely certain you’ve cleared a level with a high ratio of perfect blocks and attacks. Truthfully, I would save any potential misses for the boss fights, as they’ll often be the make or break moments for your run for this trophy. Ideally, you’d get the boss fight from Hessonite’s Warship, as that’s effectively just a regular enemy, or an encounter with larger versions of standard enemies.
I did this by abusing my Amethyst loadout (see ![]() Space Train to the Cosmos) and backing up my save at the end of every stage, only continuing on once I was certain I’d cleared a level having had only perfect attacks and blocks, saving any potential misses for the boss fight, just in case I got a bad one.
Space Train to the Cosmos) and backing up my save at the end of every stage, only continuing on once I was certain I’d cleared a level having had only perfect attacks and blocks, saving any potential misses for the boss fight, just in case I got a bad one.
Lapis is also good character to use if you’re going for this, as her (overpowered) Tidal Wave ability allows you to time your perfect hits (Bismuth’s hammer attack also has this kind of meter, but I think it’s a little more difficult to consistently hit perfects on it), and will also hit multiple times with the right upgrades. If you decide to use her, equip her with the Attack the Light and Grumpy badges, and have someone else on your team wear the Star Starter badge. In terms of her abilities, you will want to unlock nearly everything on the attack side – Raging Water Wall is unnecessary, and I also did it without Splashdown.
Otherwise, use non-QTE attacks if possible (like Amethyst’s fire breath ability), and try your hardest not to let the enemies get attacks in on you. If you want to build up your team meter outside of the Black Hole dungeon, you can overfill it so you can summon Obsidian against a boss when you have no star points left, in an attempt to kill it before it has the chance to attack. Good luck.
Complete any run of the Black Hole chapter while wearing the CBF Badge the entire time |
The CBF Badge is located in a chest in the Palace of Light. If the placement isn’t random (and I don’t believe badge placements are randomized, unlike charms), then you’ll need to go through the lower basement (the left/west basement) until you dead-end at some stairs, then take the stairs up to a previously inaccessible part of the west wing. There you will find the chest which contains the CBF Badge.
The CBF Badge will halve the stats of everyone on the team. So you’ll want to wear it during your run-through on the lowest (normal) difficulty. See ![]() Space Train to the Cosmos for help putting together a good party to get through the dungeon with minimal stress. I personally put it on Steven, along with the Turtle Badge, to still give him decent defence, and relegated Steven to items and healing only. Make sure Steven has the perk that allows him to use the cheeseburger bag twice in a single round, and ideally, unlock the upgrade that allows you to access the backpack even if Steven has fallen.
Space Train to the Cosmos for help putting together a good party to get through the dungeon with minimal stress. I personally put it on Steven, along with the Turtle Badge, to still give him decent defence, and relegated Steven to items and healing only. Make sure Steven has the perk that allows him to use the cheeseburger bag twice in a single round, and ideally, unlock the upgrade that allows you to access the backpack even if Steven has fallen.
Complete the Black Hole chapter on all three difficulties |
The Black Hole dungeon consists of randomized stages (between 3 and 6, depending on the difficulty), a cosmic treasure chest, and a boss fight. It may also contain regular treasure chests and shop stages, but that’s not always guaranteed. The bad news is that if your entire party dies, all of your progress on your current run is wiped out and an entirely new run is generated. The good news is that you can close out of the game and come back to the same run, meaning that you should be backing up your save between stages – especially on your ![]() Crying Breakfast Friend run.
Crying Breakfast Friend run.
Other than enemy HP and strength, there are different rules based on what difficulty you’re playing:
Normal: N/A
Hard: Your cheeseburger backpack is empty. You can only use items that you’ve picked up while playing in the dungeon. Hopefully you get good shop spawns and can just revisit them to pick up things like star fruit, Rose’s tears, etc.
Diamond: Your cheeseburger backpack is empty. Additionally, the purple QTE star that allows you to get perfect hits/blocks is absent (the yellow one is still present, so there’s still some help in timing it)
Do note that you only have to complete each difficulty once – which just entails defeating the boss – so defeat the boss as soon as you get access to it. It does not necessarily come after the final numbered stage! I had a run on hard difficulty (5 stages) where I could access the boss fight after stage 2. This is also why you should be farming keys on normal difficulty. The cosmic chest is not required for completion but IS required for ![]() Perfect Porkchop, so try to open the chest, even on your run for this trophy.
Perfect Porkchop, so try to open the chest, even on your run for this trophy.
You need to 100% these stages for ![]() Perfect Porkchop. The way to 100% the stages is to open four cosmic chests on each difficulty – outside of the one time you need to fight a boss on each difficulty, all you need to do is progress far enough to open the cosmic chest. Farm cosmic keys on Normal difficulty (they are almost always somewhere in the third stage – look for the question mark icon on the map). The cosmic keys will carry over between difficulties. So find all eight keys you need for the higher difficulty chests, open the cosmic chest in each run, then hit the reset button at the top of the map or die – you’ll still keep the chest opened count/completion percentage (thanks to Bdemonkid666 for confirming).
Perfect Porkchop. The way to 100% the stages is to open four cosmic chests on each difficulty – outside of the one time you need to fight a boss on each difficulty, all you need to do is progress far enough to open the cosmic chest. Farm cosmic keys on Normal difficulty (they are almost always somewhere in the third stage – look for the question mark icon on the map). The cosmic keys will carry over between difficulties. So find all eight keys you need for the higher difficulty chests, open the cosmic chest in each run, then hit the reset button at the top of the map or die – you’ll still keep the chest opened count/completion percentage (thanks to Bdemonkid666 for confirming).
There are some unique items you can get from the cosmic chests, but all that’s required is to just open them four times. The unique items: Onion’s Badge, the Prism Pal Badge, the Rose’s Tear Badge, the Ambidextrous Badge, and Connie’s two costume schematics.
There is a party you can put together that will allow you to fly through enemy encounters. This strategy hinges on how you upgrade Amethyst.
Equip her with the Lucky Star Badge (should be in a chest after the world 3 boss fight) and Shamrock Badge (should be in a chest on the balcony of Palace of Light). Craft her alternate costumes so you can equip the Super Star Whip perk, and make sure that perk is equipped.
In terms of her upgrades, you will want to have the Lucky Star, Whiplash, and Show Off upgrades unlocked. This will take a total of 34 skill points (Amethyst will need to be around level 25), so you may have to use a redo idol to reset whatever upgrades you’ve given her so you can reallocate those points. You can still do this without Whiplash, which will save you several points; Whiplash just makes this easier.
Setting up Amethyst this way, combined with how you time her whip hits, will usually generate an unlimited amount of star points, meaning that you’ll often just kill all enemies before you even need to end your turn. This is most obvious and effective with enemy groups of at least three or four; with smaller groups you may want to default to Garnet, to make the best use of your star points per round.
Team formation:
Amethyst in the back – equip her as stated above
Garnet in front – Lucky Restore and Frontline badges
Steven and Bismuth at top and bottom – put whatever you want on them based on your play style – if you’re on your ![]() Crying Breakfast Friend run, one of them will be wearing that badge. Make sure Steven has the perk that allows him to use the cheeseburger bag twice in a single round, and ideally, unlock the upgrade that allows you to access the backpack even if Steven has fallen.
Crying Breakfast Friend run, one of them will be wearing that badge. Make sure Steven has the perk that allows him to use the cheeseburger bag twice in a single round, and ideally, unlock the upgrade that allows you to access the backpack even if Steven has fallen.
If you’re on your ![]() Crying Breakfast Friend run, this strategy won’t work as well, but it still works on larger groups of enemies – it just takes longer to get started.
Crying Breakfast Friend run, this strategy won’t work as well, but it still works on larger groups of enemies – it just takes longer to get started.
