
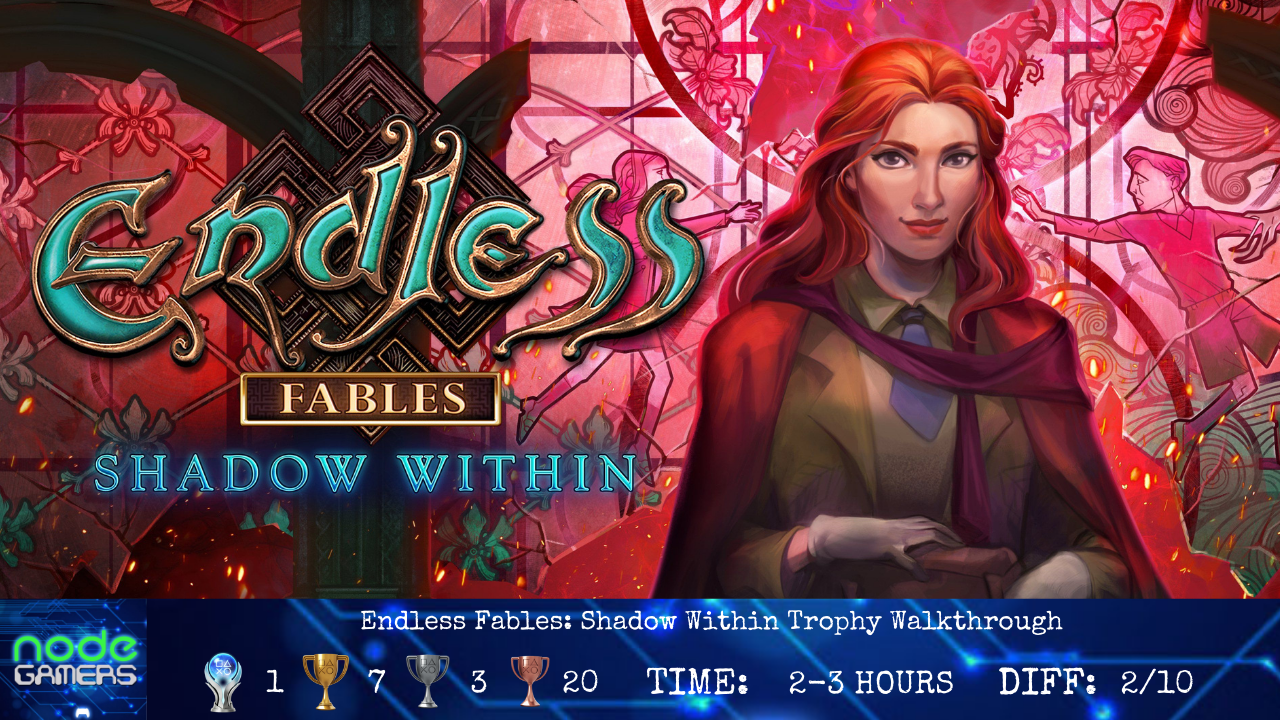
Trophy Roadmap:
Difficulty: 2/10
Estimated time to Platinum: 2 – 3 Hours
Trophies: 31. ![]() 1 /
1 / ![]() 7 /
7 / ![]() 3 /
3 / ![]() 20
20
Missable trophies: Most
Glitched trophies: None
Difficulty related: None
Playthrough: Main & Bonus Story
Introduction:
Welcome to the Endless Fables: Shadow Within trophy guide walkthrough!
Video guides of this walkthrough are fine as long as I am credited in the video and the guide linked!
This is one of the few Artfiex Mundi games where the HO scenes are always the same. As such, I will link you to a guide by Steam user bluebear with all of the solutions. I have provided one screenshot in the guide of a specific scene, where I suggest you unlock a few trophies; other than that, either solve the HO scenes yourself or use this guide.
Tips and Strategies:
Two collectibles: figurines and jigsaw puzzle pieces. Some of them are on the main screen view, but some are in zoomed in views/subwindows.
There is a trophy for completing four minigames in under 60 seconds. Just pause the game and read the solution and you should be fine. For the ones where I don’t totally outline a solution (like the storybook ones), pausing the game will allow you to just look at the picture to figure out where things are.
DO NOT SKIP HO SCENES/MINIGAMES. Skipping dialogue and cutscenes is okay. DO NOT USE HINTS IN HO SCENES.
A full Trophy Walkthrough is provided below. If you enjoy my work, please consider donating to my Ko-fi.
If you liked this guide, you’ll find more on our site.
You can also chat to our writers by joining us on Discord with this link – Discord Invite
Trophy Walkthrough:
New Game – CASUAL
Train
R3 to skip tutorial
Pick up instructions
Figurine (1/12) – underneath the table, on the chair
Puzzle (1/30) – in the circular frame on the back wall
Pick up bag from table
In inventory, zoom (  ) on bag and click until you get key and kronen
Talk to man in hallway
Zoom on door
Click door, then use kronen with it – ![]() Improviser unlocked
Improviser unlocked
Zoom on suitcases above seat
Use key with lock
Walk up to suitcase
Solve HO scene – get ticket – ![]() Diamond in the Rough unlocked
Diamond in the Rough unlocked
Use ticket with man
Talk to girl
Find the missing items on each set of pages and put them in the gray picture. There are three rounds of this – ![]() Storyteller unlocked
Storyteller unlocked
Exit right to Mittenwald
Use instructions with anywhere
Click on the places that are in capital letters. The pictures make it obvious what the thing is. You can’t mess this up.
Main Street
Zoom on bike
Puzzle (2/30) – behind the rear tire
Click leaves until you get magnet, then back out
Zoom on grate in street
Use magnet with grate – get door ornament
Click flowers above bike x2
Click flowers until you get door ornament, then back out
Walk up to door
Use door ornaments with slots
Move the pieces around so that the line is unbroken. If the piece is green, it’s in the correct place. You may unlock ![]() Run like the Wind here but don’t worry if you don’t.
Run like the Wind here but don’t worry if you don’t.
Exit to Agatha’s Apartment
Agatha’s Apartment
Zoom on cat
Pick up tweezers, then back out
Walk up to left bookshelf
Click left knob – get broken knob
Use tweezers with paper – get note with arrows, then back out
Zoom on left desk
Puzzle (3/30) – under left books
Zoom on box
Use note with arrows with box and enter combination
Pick up scissors and smelling salts, then back out
Zoom on body
Use smelling salts with body – get torn notebook
In inventory, click on notebook until you get knot emblem
Zoom on left desk
Pick up cat toy
Click lamp x2, then pick up light bulb
Zoom on desk drawer
Use knot emblem with slot
Pick up string, note, and photos, then back out
Walk up to corkboard above left desk
Pick up kronen
Use string with corkboard, then back out
Exit back to Main Street
Main Street
Zoom on bike
Use scissors with bag
Click bag until you get rag, glue, and kronen
Zoom on kiosk
Use kronen with woman
Solve HO scene – get newspaper
Zoom on flowers above bike
Use scissors with flowers – get stick
In inventory, combine glue and broken knob – get knob
In inventory, combine newspaper and scissors – get articles
In inventory, combine stick and cat toy, then click a few times to finish it
Exit to Agatha’s Apartment
Agatha’s Apartment
Zoom on cat
Use cat toy with cat
Pick up note and lightbulb
Walk up to corkboard
Use notes and articles with corkboard
Grab the articles and fill in the outlines – you can’t mess this up – then add photos
Number the photos left to right 1-7 (you can’t mess this up, but this is for doing it in under 60 seconds)
Top row: 4 / 3 / 6
Middle row: (nothing) / 2 / (already placed)
Bottom row: 5 / 7 / 1
Pick up symbol clue, then back out – ![]() A Cut Above and
A Cut Above and ![]() Detective Inspector unlocked. This is also the earliest you can unlock
Detective Inspector unlocked. This is also the earliest you can unlock ![]() Faster than Light but you probably haven’t done that yet.
Faster than Light but you probably haven’t done that yet.
Zoom on ceiling lamp
Use rag with lightbulb – get lightbulb
Walk up to back wall
Use lightbulbs, then symbol clue with wall
Top row is 1-4. Bottom row is 5-10.
Round 1: 6 / 3 / 9
Round 2: 1 / 7 / 10 / 4 / 8
Round 3: 5 / 3 / 9 / 2 / 7 / 8
You will get frequency setting
Walk up to left bookshelf
Use knob with slot, then add frequency setting
 , then
  – if you haven’t unlocked
 ![]() Run like the Wind yet, you will have here. I also unlocked
Run like the Wind yet, you will have here. I also unlocked ![]() Faster than Light here, but you definitely still have time to unlock it if you haven’t.
Faster than Light here, but you definitely still have time to unlock it if you haven’t.
Castle Entrance
Puzzle (4/30) – near the top right corner of the screen, in a gap between the red tree leaves
Zoom at bottom of gate
Pick up axe handle and gloves
Zoom on tree trunk
Use gloves with vines
Pick up hexagon and broken axe
In inventory, combine axe and handle – get axe
Use axe with tree trunk
Pick up flag (pole)
Walk up to tree trunk bridge
Use pole with trunk
This minigame doesn’t work very well. Just keep pushing through. I found it sometimes helpful to back out and go back in, to kind of reset position without losing progress.
Once you’ve crossed, you’ll be in an HO scene. Quit to Main Menu (autosave) and consider backing up your save. We’re going for ![]() Crystal Clear and
Crystal Clear and ![]() No Stone Unturned here. Reload if needed.
No Stone Unturned here. Reload if needed.

Zoom on car, then trunk
Use key with keyhole
Figurine (2/12) – on left side of trunk
Pick up chain with hook
Click arrow, then use chain with license plate
Grab hook and move it to the gate
Exit to Courtyard – ![]() Infiltrator unlocked
Infiltrator unlocked
Courtyard
Puzzle (5/30) – in the top left corner of one of the back wall panels. Put the cursor between the archway with the circle in it and the well roof, and you’re in the right location
Talk to man
Walk up to right door
Pick up warning sign, then back out
Walk up to well
Pick up creature head, then back out
Zoom on left door
Use warning sign with door
Exit to Museum
Museum
Figurine (3/12) – on the couch
Puzzle (6/30) – in the glass display case, next to a globe
Zoom on broken display case (back wall)
Pick up creature head, then back out
Zoom on mirror
Pick up iron ornament
Use creature heads with slots
Pick up hexagon
Exit back x2 to Castle Entrance
Castle Entrance
Zoom on car
Use iron ornament with slot
Pick up oil can and lockpicks
Walk up to tree bridge
Solve HO scene – get crest decoration
Exit to Courtyard, then Museum
Museum
Zoom on broken display case
Click the two pieces of broken wood so they fill half of the form on the left side of the screen
Use lockpicks with lock
Click spear – get polearm
Zoom on left shield
Pick up window fragment, then back out
Exit back to Courtyard
Courtyard
Zoom on cannon
Pick up window fragment, then back out
Walk up to right door
Use hexagons and crest decoration with slots
You just need to rotate each piece so that the picture makes sense.
Exit to Chapel
Chapel
Talk to girl
Pick up flashlight
Zoom on top of stairs
Puzzle (7/30) – on right wall
Pick up dagger, then back out
Zoom on left pillar
Pick up wolf emblem
Use oil can with lever, then click it
Exit back to Courtyard
Courtyard
Zoom on statue
Use wolf emblem with slot
Pick up wolf amulet, then back out
Exit to Museum
Museum
Zoom on couch
Use flashlight with dark
Pick up the five broken stone pieces, then put the statue together – get angel
Zoom on shield behind glass
Use wolf amulet with slot, click, then pick up round shield
Exit back to Courtyard
Courtyard
Zoom on cannon
Use round shield with cannon, then click
Pick up empty sheath
Use pole arm with wood
Pick up sapphire sun
In inventory, combine dagger and empty sheath
Exit to Museum
Museum
Walk up to back wall
Use dagger with slot
Bottom left is 1, bottom right is 9. Click in order: 1 / 4 / 5 / 6 / 8 / 7
Pick up window fragment and onyx star, then click button
Walk up to display case
Solve HO scene – get M initial
Exit back to Courtyard, then Chapel
Chapel
Walk up to broken windows
Pick up bucket
Use window fragments with windows
Put the windows together – pieces will lock when they’re placed correctly
Zoom on top of stairs, then the cylinder
Put in the combination shown by the glowing symbols
Pick up broken emblem
In inventory, combine broken emblem and M initial – get lord emblem
Exit back to Courtyard
Courtyard
Walk up to well
Use lord emblem with lock
Click bars to remove them – the correct ones will sparkle if you’re having trouble
Use bucket with water – get star prism
Exit to Chapel
Chapel
Zoom on lowered lamp
Use sapphire sun and star prism with slots
Click star prism and pick up metal claw
Walk up to left wall
Use onyx star with slot
Pick up devil, then back out
Exit back to Courtyard
Courtyard
Zoom on statue
Use angel and devil with scales
Pick up metal claw
Exit to Chapel
Chapel
Walk up to left wall
Use metal claws with thing
Pick up dragonfly amulet
Walk up to left wall
Use dragonfly amulet with slot
You can’t mess this up, but:
middle symbol on the left side / bottom left symbol on the right side / right symbol on the bottom / right symbol on the top
Exit to Nightmare Realm
Nightmare Realm
![]() Well-Traveled unlocked after cutscene
Well-Traveled unlocked after cutscene
Zoom on monster skull
Puzzle (8/30) – on the rock next to the skull
Pick up fang and nightmare token
Zoom on green eggs on right
Pick up devil claw
Use fang with egg and pick up nightmare token
Zoom on green eggs on left
Click vines, use devil’s claw with nightmare token
Pick up prince of nightmares figurine
Walk up to statue
Use prince of nightmares with slot
Use nightmare tokens with slots
Number the rows from top to bottom. 1-3 / 4-6 / 7-10 / 11-14 / 15-17
Click in order: 9 / 10 / 6 / 14 / 17 / 16 / 12 / 13 / 9
10 / 14 / 17 / 16 / 15 / 11 / 7 / 8 / 12
11 / 7 / 8 / 9 / 13 / 14 / 17 / 16 / 12
13 / 14 / 17 / 16 / 12 / 8 / 9
Burrow
Zoom on hanging box
Puzzle (9/30) – behind the vines on the box
Pick up matchbox and blueprint, then back out
Pick up saw (next to man)
Talk to man – get spider disc
Exit to Abyss of Dreams
Abyss of Dreams
Figurine (4/12) – among the toy pile on the left
Zoom on flytrap plant
Puzzle (10/30) – behind the vines
Pick up sappy plant (left of eyeball), then back out
Zoom on brown rock next to flytrap plant
Pick up scarab emblem, then back out
Exit back to Burrow
Burrow
Walk up to left wall
Zoom on chains, use spider disc with slot, click until the arrows meet, then click boards
Click the books to match up the symbols. It’s randomized.
Pick up medicine book
Zoom on ground box
Pick up mushroom
Use scarab emblem with slot, then click
Use matchbox with box, click all six bugs – get matchbox of bugs
Zoom on hanging box
Use matchbox of bugs with creature
Pick up mortar and teddy bear
Exit to Abyss of Dreams
Abyss of Dreams
Zoom on brown rock
Use mortar with outline
Zoom on broken thing in the middle of the screen
Pick up all five lever pieces
In inventory, put the lever together, then add the sappy plant – get strange lever
Zoom on lever base, add the lever, and click it
Pick up weapon (giant sword by door)
Exit to Alchemist’s Workshop
Alchemist’s Workshop
Zoom on desk
Puzzle (11/30) – under the window, being blocked by the top of the quill feather
Pick up green bottle (weed killer), then back out
Zoom on skeleton
Use saw on rib cage, pick up crooked shell, then back out
In inventory, combine weed killer and crooked shell
Exit back to Abyss of Dreams
Abyss of Dreams
Zoom on flytrap plant
Use weed killer with flytrap
Pick up eyeball
Pick up mandrake
Pick up the three skulls, then back out
Exit to Alchemist’s Workshop
Alchemist’s Workshop
Pick up mortar (at skeleton’s feet)
Zoom on chest
Use skulls with slots, then click
Pick up dragon seal, then back out
Zoom on desk
Use dragon seal with slot and click
Pick up herb, then back out
Walk up to fireplace
Use medicine book, herb, mortar, mandrake, and mushroom with fireplace
Follow the steps – you can’t mess this up
Pick up remedy – ![]() Creator of Potions unlocked
Creator of Potions unlocked
Exit back x2 to Burrow
Burrow
Use remedy with man – get eye token
In inventory, combine eye and eye token
Zoom on mirror
Use eye token with slot
Zoom on mirror
Pick up dodecahedron part and helmet insignia
Exit to Abyss of Dreams
Abyss of Dreams
Zoom on brown rock
Use helmet insignia with outline, then back out
Exit to Battleground
Battleground
Left arrow
Pick up weapons (mace, and bow and arrow)
Right arrow
Zoom on standing knights
Pick up spear
Use weapons with knights
Zoom on horse knight
Pick up uncharged scepter, then back out
In inventory, zoom on scepter and pick up weak amulet
Exit back to Abyss of Dreams
Abyss of Dreams
Zoom on flytrap plant
Use spear with bag
Click bag until you get bear insignia
Zoom on brown rock
Use bear insignia with outline – ![]() Traveller of Dreams unlocked
Traveller of Dreams unlocked
Exit to Children’s Room
Children’s Room
Puzzle (12/30) – on the bookshelf, above the hourglass
Zoom on bookcase
Pick up crochet book and ditty box, then back out
Zoom on kid under window
Click left unicorn
Pick up fish token, then back out
Zoom on left wall shelves
Pick up glass of water and hairbrush, then back out
Map (d-pad right) – ![]() Look Before You Leap unlocked – Battleground
Look Before You Leap unlocked – Battleground
Battleground
Left arrow
Walk up to chained door
Use crochet hook with lock
Use hairbrush with puzzle
There are several ways to do this. Here’s one (most of the work done; the final few moves should be obvious).


Pick up unicorn, flint-steel, dodecahedron fragment, and phoenix feather
Zoom on skull where beast was
Puzzle (13/30) – not even hidden. It’s just there.
Use glass of water with skull
Pick up eye emblem, then back out
Exit back to Abyss of Dreams, then Alchemist’s Workshop
Alchemist’s Workshop
Zoom on skeleton
Use eye emblem with slot
Pick up syringe
Zoom on chest
Click green bottle (near red flask)
Use unicorn with slot, then click blue bottle
Use weak amulet with top shelf
Grab the bottles and use them with the amulet – green / blue / yellow
Pick up charged amulet
Exit back to Abyss of Dreams, then Children’s Room
Children’s Room
Zoom on left shelves
Use flint-steel with candle
Walk up to left bed
Solve HO scene – get fish token
In inventory, combine fish tokens
Zoom on bookshelf
Use fish token with slot
Pick up book ornament
Click red book, and use book ornament with slot
Solve the puzzle – you’ve done this before
Pick up phoenix feather and gem
In inventory, combine uncharged scepter and charged amulet, then add phoenix feathers – get scepter
In inventory, combine teddy bear and ditty box, add gem, then fix up the teddy bear – get teddy bear
Zoom on kid under window
Use teddy bear with kid
Pick up dodecahedron piece, then back out
Exit back to Abyss of Dreams, then Battleground
Battleground
Zoom on skull
Use syringe with anywhere – get dark blood
Right arrow
Zoom on horse knight, and use scepter with him
Exit back to Abyss of Dreams, then Alchemist’s Workshop
Alchemist’s Workshop
Zoom on desk
Use dark blood with book – ![]() Expert of History unlocked
Expert of History unlocked
Click on book until you get dodecahedron piece
In inventory, combine blueprints and dodecahedron fragments, then add the dodecahedron pieces
Fill in the blueprint – get dodecahedron
Exit back x2 to Burrow
Burrow
Use dodecahedron with man
Exit to Shelter
Shelter
Figurine (5/12) – on the lowest of the left shelves
Zoom on table
Pick up oil, then back out
Talk to king – get gear – ![]() Envoy of Fluffs unlocked
Envoy of Fluffs unlocked
Walk up to right shelves
Solve HO scene – get crow badge
Exit back to Lava Field
Lava Field
Zoom on bag (left side of bridge)
Figurine (6/12) – under the bag
Pick up fabric strip, then back out
Zoom on vines at bottom of stairs
Use oil, then flint-steel, with vines – get empty jar
Use fabric strip with thing, then pick up gilded cogwheel
Walk up to bridge mechanism
Grab the two gears, put them on the left side of the mechanism
Walk up to side of mechanism
Pick up wreath ornament, then put gilded cogwheel in slot
Use gear with slot
left blue: D / Rx6 / Ux2 / Lx2
right green: Lx3 / Ux2 / L
fill in the other two
Back out, then exit to Gate of Light
Gate of Light
Zoom on top of left pillar
Pick up flower
Zoom on base of left pillar
Puzzle (14/30) – above the red fruit
Pick up red fruit and crystal leaf, then back out
Zoom on vines
Use empty jar with vines
Pick up sharp seashell, then back out
Exit back to Lava Field
Lava Field
Zoom on chest
Puzzle (15/30) – under the left wings
Use sharp seashell with rope
Click junk until you’ve picked up tweezers and put together an emblem (one of the pieces is next to the emblem slots)
Pick up fairy wing
Exit to Shelter
Shelter
Walk up to top shelf
Use sharp seashell with puzzle – get lichen dust, then back out
Zoom on middle shelf
Puzzle (16/30) – next to the picture of the bottle; above the creature’s head
Use lichen dust, flower, and fairy wing with creature – get restorative potion, then back out
Exit back to Lava Field, then Gate of Light
Gate of Light
Zoom on vines
Use tweezers with bugs – get crystal borers
Use restorative potion with tree
Walk up to door
Solve HO scene
Exit to Harbor
Harbor
Figurine (7/12) – in the plants on the left, directly left of the ripped sail wing
Walk up to box on right
Pick up wary blade, click the jewel thing, then back out
Zoom on statue
Puzzle (17/30) – above the crystals
Pick up both painted tokens, then back out
In inventory, zoom on wary blade and click it – get jagged blade
Exit back x2 to Lava Field, then Shelter
Shelter
Walk up to top shelf
Use painted tokens with slots
Starting positions are random. You need to swap adjacent triangles to make a picture. You can use  to reset the puzzle to different starting positions, in hopes that you get a clump of tiles already together, especially because the majority of this puzzle is blue.

Pick up aviation crystals
Exit back to Lava Field
Lava Field
Zoom on bag (left side of bridge)
Use jagged blade with bag
In inventory, click bag until you get blank parchment and leather with strings
Exit to Gate of Light, then Harbor
Harbor
Use aviation crystals with boat
Zoom on broken wing
Use leather with strings with hole
Zoom on chain and use crow emblem with slot – ![]() Builder of Boats unlocked
Builder of Boats unlocked
Navigate through the puzzle
Portal Platform
Figurine (8/12) – at the bottom of the stairs, on the right
Puzzle (18/30) – disguised as a cloud just above the floating island on the left
Zoom on skeleton
Grab dagger and use it with helmet
Pick up helmet, charcoal (on shield hand), and leg bone
Zoom on fountain
Pick up bird ornament
Use helmet with fountain – get water
In inventory, combine bird and wreath ornaments – get bird embellishment
In inventory, combine exotic fruit and bone – get buggy juice
Zoom on end of path
Use water with vines
Exit back x2 to Gate of Light
Gate of Light
Zoom on bottom of left pillar
Use bird embellishment with slot
Pick up dragonfly figurine and decrystallization liqueur
Exit back to Lava Field, then Shelter
Shelter
Zoom on table
Use dragonfly figurine with slot
Pick up magic dust
Zoom on middle shelf
Use magic dust with creature – get magical paint
Map – Harbor
Harbor
Zoom on statue
Use decrystallization liqueur with crystals
Pick up paintbrush
Walk up to box on right
Use parchment, then charcoal, with slot – get stencil
In inventory, combine stencil and crystal leaf, then add buggy juice, then add crystal bores – get illumination crystal
Use illumination crystal with slot
Complete the light mazes – one on each side.
Pick up uncharged scepter
Exit to Portal Platform
Portal Platform
Walk up to tree
Talk to creature
Use brush and magical paint with bowls
Paint the sun, then use dodecahedron with it
In inventory, combine scepter and magic gem
Use scepter with man
Rune battle – choose whatever symbol (not necessarily the pair) is not in your opponent’s ring. Three rounds.
You will get griffin symbol at the end – ![]() Defender of Souls unlocked
Defender of Souls unlocked
Sewers
Figurine (9/12) – in the grass directly underneath the man
Pick up handle (left boxes)
Zoom on gargoyle
Puzzle (19/30) – top left corner of subwindow
Pick up handle and doll, then back out
Talk to man – get ornate clippers
Zoom on back wall
Pick up small furnace and handle
Up arrow
Click broken handle, then add handles
Up arrow
Pick up musician emblem
Exit via back wall to Ruined Street
Ruined Street
Zoom on wagon
Use ornate clippers with rope
Click junk until you get Gunther’s bag, chloroform, and crossbow
In inventory, combine broken doll and chloroform
Use broken doll with monsters – ![]() Lord of Animals unlocked
Lord of Animals unlocked
Exit to Lady’s Room
Lady’s Room
You will get guessing card
Figurine (10/12) – under the bed
Puzzle (20/30) – above the woman’s head, just under the open ceiling
Zoom on cat
Pick up foil leaf, then back out
Walk up to cabinets on right
Solve HO scene – get crystal chest
Zoom on cabinets on right
Pick up screwdriver, then back out
In inventory, combine crystal chest and guessing card
Bear / Fox / Chicken / Frog
Pick up foil leaf and empty record sleeve
Zoom on record player
Pick up cork
Left arrow
Use screwdriver with plate
Pick up broken emblem
Right arrow x2, pick up starting lever, then back out
Exit back to Ruined Street
Ruined Street
Zoom on junk on right
Puzzle (21/30) – on the ground, just right of the box
Pick up damaged wheel
Pick up musician emblem
Zoom on box
Use foil leaves with slots
Pick up clay, then back out
In inventory, combine clay and broken emblem, then add small furnace – get musician emblem
Exit to Lady’s Room
Lady’s Room
Zoom on bottom of right shelves
Use musician emblems with slots
Use empty record sleeve with records
1-7 / 3-10 / 4-9 / 5-11 / 6-8 – get calming music
Zoom on record player
Use calming music with record player
Zoom on cat
Click all four needles – get knitting needles
Click on woman, then pick up necklace amulet
In inventory, combine damaged wheel and knitting needles – get repaired wheel
In inventory, combine uncharged scepter and necklace amulet – get scepter
Exit back to Ruined Street
Ruined Street
Zoom on junk on right
Use repaired wheel with bike – get bike
Use bike with end of the street (“Ruined Castle”)
Ruined Castle
Zoom on stone
Use crossbow with stone
Grab bolt and put it on crossbow
Use scepter with woman
Rune battle – three rounds – get griffin sigil – ![]() Savior of Souls unlocked
Savior of Souls unlocked
Exit back to Ruined Castle
Zoom on wrecked car
Puzzle (22/30) – on the rock in the lava
Pick up jack and musketoon symbol
In inventory, combine jack and starting lever
Exit back to Ruined Street, then Lady’s Room
Lady’s Room
Zoom on right shelves
Use musketoon symbol with slot
Walk up to right shelves
Solve HO scene – get gunpowder and long scarf
Exit back to Ruined Street, then Ruined Castle
Ruined Castle
Zoom on wrecked car
Use long scarf with squirrel
Pick up owl trinket
In inventory, combine Gunter’s bag and owl trinket
Pick up gargoyle clue and bombshell
In inventory, combine bombshell and gunpowder, then add cork – get light bomb
Exit back x2 to Sewers
Sewers
Zoom on gargoyle
Use gargoyle clue with gargoyle
Make the gargoyle match the clue (should be head once and right wing x2)
Walk up to sewer grate
Solve HO scene – get tome – ![]() Crown Jewel unlocked
Crown Jewel unlocked
In inventory, combine tome and griffin sigils, turn the page, and pick up mural fragment
Map – Ruined Chapel
Ruined Chapel
Zoom on left wall
Use jack with gap
Use light bomb with monsters
Zoom on left wall
Pick up dodecahedron and mural fragment
Zoom on top of stairs
Puzzle (23/30) – top right of archway
Use mural fragments with slots
Pick up final amulet
In inventory, combine final amulet and uncharged scepter – get scepter
Use scepter with monster
Rune battle – three rounds – ![]() Heart and Soul and
Heart and Soul and ![]() Protector of Realms unlocked
Protector of Realms unlocked
BONUS GAME – CASUAL
Feel free to use hints / skip minigames EXCEPT ON A CERTAIN ONE. I will warn you (it’s very early on).
Overlook
Talk to creature
Figurine (11/12) – on the left side of the stairs leading up to the tree house
Puzzle (24/30) – camouflaged on the rock where the creature was standing
Zoom on top right corner of screen
Pick up windchime, then back out
In inventory, zoom on windchime and click until you get wire and ornate key
Exit to Shelter
Shelter
Zoom on right shelves
Pick up pincushion
While still zoomed, zoom on viola
Pick up string, then back out
In inventory, zoom on pincushion and click until you get sponge and packing needle
Walk up to creature. DO NOT SKIP ANYTHING DURING THIS PUZZLE
Click the things that are in capital letters. You can’t mess this up. Just don’t skip the puzzle!
You will get the chest and unlock ![]() Patient Listener and
Patient Listener and ![]() Scholar of History afterwards
Scholar of History afterwards
Use sponge with pink flower on floor – get wet sponge
In inventory, combine chest and key, pick up soap, then back out
In inventory, combine wet sponge and soap – get soapy sponge
Exit back to Overlook
Overlook
Walk up to lyre
Pick up yo yo, golden bee, and broken sky amulet
Click broken strings
Use strings with lyre
Use soapy sponge with dirt
Play the symbols from top to bottom
Exit via pink cloud to Flying Windmill
Flying Windmill
![]() Master of Aviation unlocked
Master of Aviation unlocked
Puzzle (25/30) – at the base of the tree
Zoom on clock
Pick up pouch, then back out
Pick up damaged windmill wheel (on stones just right of tree)
Pick up torch part (on map)
Walk up to map (on right)
Pick up ruby leaf, then back out
Zoom on gear machine
Pick up opal knife
Use damaged windmill wheel with machine, then back out
Zoom on top of windmill
Pick up night sky amulet
Use opal knife with thorns, then back out
In inventory, click pouch until you get burlap yarn
In inventory, combine sky amulet and broken sky amulet – get sky amulet
In inventory, combine chest and ruby leaf, click until all three are lit, then pick up map ring
Exit back to Overlook, then Shelter
Shelter
Zoom on netting
Use opal knife with netting
Puzzle (26/30) – on the back wall of this little shelf
Pick up tuna can and string
Use night sky amulet with slot
Pick up smoker
Zoom on shelves
Use smoker with bees
Pick up honey jar
In inventory, combine honey jar and golden bee, then pick up honeyed clock hand
In inventory, combine yo yo and string – get yo yo
In inventory, combine honeyed clock hand and yo yo – get clock hand and sticky yo yo
Exit back to Overlook
Overlook
Zoom on top right corner of screen
Use sticky yo you with branches – get fabric pieces
Exit to Flying Windmill
Flying Windmill
Zoom on top of windmill
Use fabric pieces with holes, match them up, then add yarn and needle
Zoom on clock
Use clock hand with clock, click it, and pick up map ring
Zoom on gear machine
Use tuna can with gears, click, and pick up map ring
Walk up to map
Use map rings with slots
Solve or skip
Ruined Windmill
You will get fluffy nimbus
Puzzle (27/30) – on the ground in a gap between the broken fences
Pick up the two straw bundles
Zoom on windmill
Pick up bucket and board with pulley
Use straw with scarecrow
Click clothes and dress the scarecrow
Walk up to windmill
Solve HO scene – get disguise supplies
In inventory, combine torch part and tar bucket – get unlit torch
In inventory, combine fluffy nimbus and disguise supplies, then turn it into a fake bee
Use fluffy nimbus with Wasp City
Wasp City
![]() Lord of Spies unlocked
Lord of Spies unlocked
Figurine (12/12) – in one of the honeycombs, near the top right corner of the screen – ![]() Puppeteer unlocked
Puppeteer unlocked
Puzzle (28/30) – camouflaged on the right wall, just near where the figurine was
Zoom on grub in left honeycomb
Pick up chain, then back out
Zoom on cell
Pick up jeweled bracelet, then back out
Exit to Queen’s Chamber
Queen’s Chamber
Puzzle (29/30) – on the wall just right of the force field surrounding the queen
Zoom on vines
Pick up spear haft, then back out
Walk up to candy pile
Puzzle (30/30) – behind the right candy cane – ![]() Jigsaw Fanatic unlocked
Jigsaw Fanatic unlocked
Use unlit torch with fire – get lit torch
Pick up chest and candy (peppermint), then back out
Exit back to Wasp City
Wasp City
Zoom on grub in left honeycomb
Use candy with grub, then pick it up
In inventory, combine spear haft and grub, then add jeweled bracelet – get grabby stick’
Use grabby stick with bee – get bee insignia
Zoom on cell, then walk up to lock
Use bee insignia with slot
Solve or skip
Zoom on opened cell
Use lit torch with web
Pick up onyx skull emblem
Use grabby stick with disc – get sun emblem
In inventory, combine chest and onyx skull emblem, then pick up spectacle pieces
In inventory, combine board with pulley and chain, then add sun emblem – get rotary saw
In inventory, zoom on spectacle pieces, then piece them together
Exit to Queen’s Chamber
Queen’s Chamber
Walk up to candy pile
Use rotary saw with guard – get hornet queen seal
Zoom on vines
Use rotary saw with vines
Use hornet queen seal with slot
Use spectacles with hornet queen
Solve or skip – ![]() Savior of Fluffs and
Savior of Fluffs and ![]() Platinum unlocked
Platinum unlocked
I hope this helped you? If you enjoy my work, please consider donating to my Ko-fi.

One thought on “Endless Fables: Shadow Within Trophy Walkthrough”